Itn 221 Linux Portfolio V1.3
This document is a ongoing document where I will be adding Portfolio items for ITE221. I may have ugly drafty things on this page. I’ll update the date on the page each time there is an update.
What is linux?
Linux is a unix based operating system that was developed during the 90s and is made up of many different versions and distributions for various needs ranging from Retail Point of Sale systems to GPS systems, cell phone operating systems, and even hacking tools. Linux is known for having particular features like:
- Being a free operating system with server capabilities.
- Having an open source development system and use.
- easily modifiable and to create custom systems for specific needs
- Being extremely reliable.
Why is Linux Important
Linux is an IT admin’s dream. Linux has been known to be resilient against viruses, can be crash proof, and gets updated very quickly. That along with it’s price (generally free) makes it great for servers, small business networks, and development environments. The ease of development on a Linux or Unix based system make it great for developers. The availability of tools like bash scripts also make it easy for admins to do tasks that sometimes can take a long time if done step by step.
Open Source vs Closed Source
Linux has been Open Source Developed. This means two things:
- It first means that essentially anyone can be part of the development. When working on systems as vital as a full operating system, having varying developers means that the systems are almost always secure and reliable. Applications that are open source developed often go through many improvements and changes and are facilitated using a version control system. To put it simply, imagine many different suggestions for what to do next on a project, and then the best options get put into play.
- It also means that the rights to use the software is generally open and free for anyone to use. Open source allows to have as many people using and working on the progress of the system at once. In theory this makes the system inheirently stronger.
Distros
Distros are short for Distributions and the different versions of linux. Sometimes Distros are created or forked from different opinions or methods for doing something in the Open Source Development process. Distros are also created for specific needs, like taking a system and adjusting it so it works well in a manufacturing environment for controlling machines, or creating a system that works on a small embedded device.
Note: Information about distros and their updates can be found on DistroWatch.com
##Live Boot A popular way to run Linux is the Live boot. Often users have machines with operating systems already installed and want to use Linux periodically or for special use cases. In those cases, the Live boot comes in handy. Live booting is esentially using any machine to boot into a linux OS that is loaded onto a flash drive or CD rom.
To Live boot:
- Download the linux distro’s ISO from it’s website. Find the appropriate website from distrowatch.com
- Burn the ISO to a Disk or to a USB Flash drive.
- Boot your machine up and use the appropriate key combination during startup to tell the computer to boot to the CD or to do Flash drive.
- You’re live! Live Booting allows a user to explore Linux or use it as if it was installed like a typical Operating system. Live booting allows you to work in an isolated system, not interfering with the hard drive or the original operating system.
This makes it good for system and hardware diagnosis as well as leaving a limited footprint. Because it’s isolated from the harddrive, it doesn’t have a way to save files beyond the computer’s shutdown. This lack of persistence is both a benefit as well as a limitation. Some flash drive installs can be formatted and installed with a part of its available storage as persistent storage to remedy this.
Note: When running live, you’re running directly from RAM, meaning it’s resource intensive. You’ll need a bit of extra RAM to run a live boot.
Linux vs Unix
You may see some people use these titles interchangeably or even use NIX to talk about either of them. What you need to know is that Linux was developed from Unix, in the same way Windows was developed from DOS. Other operating systems are also based off Unix like MacOS, Android, iOS, and even Playstation 4. To put it simply, everything that isn’t Windows is most likely based off a Unix system.
Installing Ubuntu Linux
In this quick walkthrough of installation, I’ve decided to use the ever popular Ubuntu. These instructions are a general overview and may be sightly different depending on what Distro you decide to use. The idea is the same.
- Download the Ubuntu iso from the Ubuntu website. Make sure you pick the version you’d like and the correct architecture.
Note: Some Distros will come with many different iso versions for various machine types, including small ARM devices, cell phones, 32 and 64 bit machines, and even VM specific. These aren’t always mandatory but can make it easier.
- Burn the ISO to a CD, DVD, or burned onto a Flashdrive. If you’re installing onto a Virtual Machine, the .iso file does not need to be burned onto a disk or setup to be bootable. You may install directly from the .iso.
- While starting up your machine, use the appropriate key combination to get to the boot options and choose the medium that the linux installer is located
- The computer will now boot into the installer. Some installers will give you various options for the version you’d like to install or even the option to Live Boot. Graphical installs will be the easiest for a first timer.
- The installer will ask for the language to use during the install

- Pick Install Ubuntu to install onto the machine’s harddrive. This install process will format the harddrive partition and erase all data on that drive.
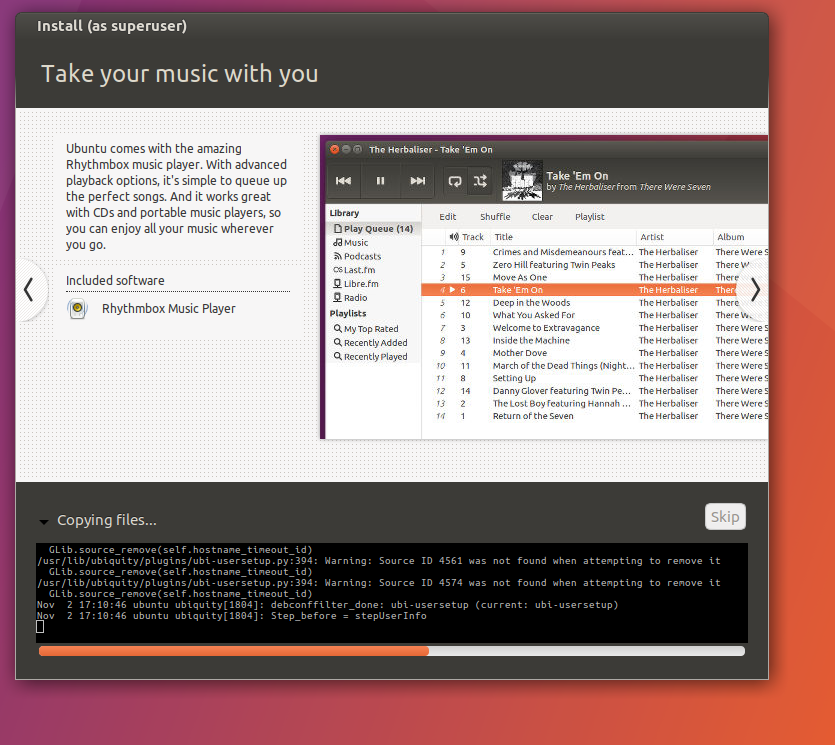
- The preparing to install download menu will prompt you to allow it to download updates and additional third party software during install. You can skip these, but choosing them now takes care of these so we don’t have to do it later.
- The installation type menu will ask you how to handle the the formatting of the harddrive. You can choose to erase and install. You’ll also be prompted for the options of hard drive encryption and Logical Volume management. These are not mandatory for the install but could be useful.
- Click install now and a prompt will review how the harddrive will be handled and what options will be included. Review and click continue to start the install.
- It will ask about your timezone and location. Choose your location and press continue.
- Select your keyboard layout and hit continue.
- You’ll be prompted to enter in user account information including the name and and password. Fill this out and hit continue. Some versions and other Distros will ask for you to create the Admin account here as well.
- The install will begin and a progress bar will be shown. This may time some time.
- Once the install is complete, it will prompt you to restart. Once the computer restarts, the install is complete.
You’re done. You now have a Linux OS install with an Admin account and a local account.
First Time in Linux
Environments.
When it comes to linux. The options of Distros, and versions of each Distro, as well as the actual environments give you plenty of options and customization available within Linux. It’s important to note the difference between Linux Desktop Environments and Linux Distros.
Desktop Environments are essentially the style and layout of the Desktop GUI. Many Distros will use the same Desktop Environments. I won’t go over all of the environments but I will note that Ubuntu uses the Unity Environment. If you’re familiar with Mac OS you’ll see similarities between Unity’s organization of a application bar, a app interface called a HUD that includes a search bar, and even the top bar.
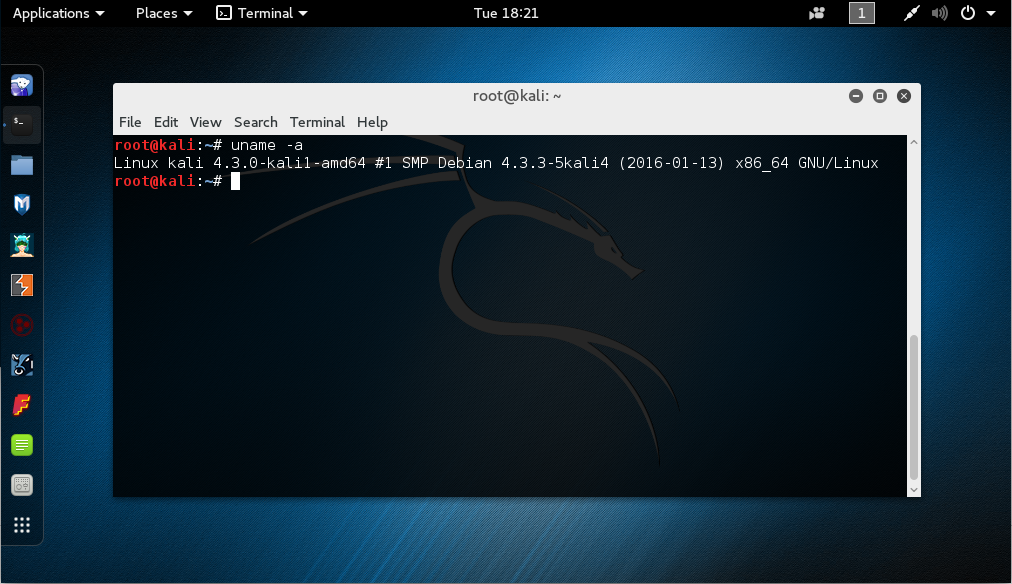
Later we will talk a little bit about Kali Linux. Kali uses the Gnome Environment. Gnome is very close to Unity, but has some slight differences like the Activities tool bar drop down and some differences in the file manager.
Lastly I will mention the KDE environment due to it’s similarity to older Windows Environments.
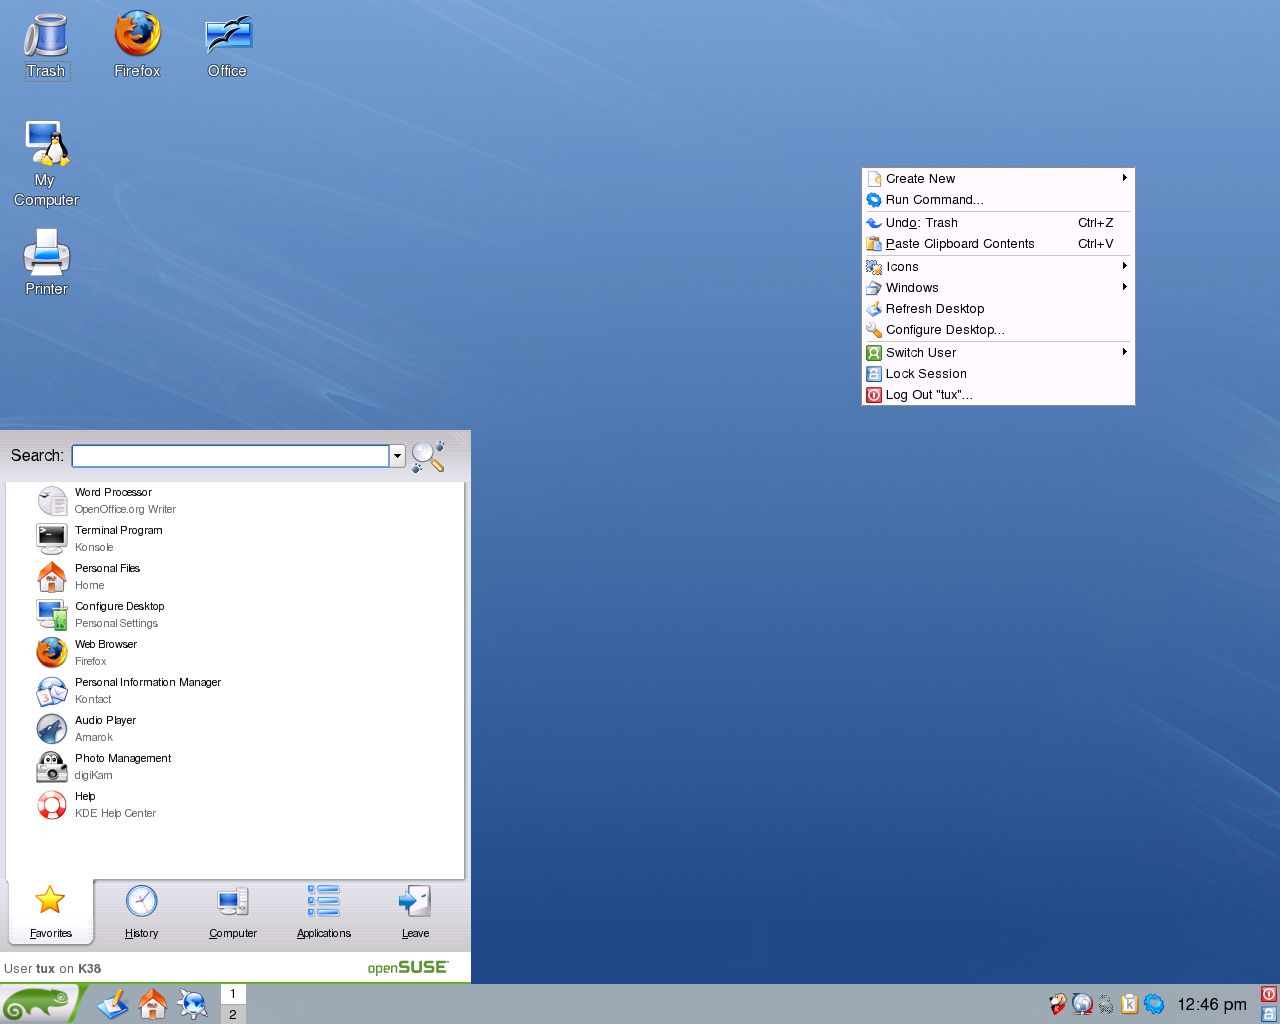
KDE is unique compared to Gnome and Unity and includes things like desktop widgets. KDE is known to be resource efficient (although DEs like LXDE and IceWM are much lighter) when set correctly, making it a lightweight option. KDE has been made popular as the Environment for Kubuntu.
Ubuntu Tour
Desktop
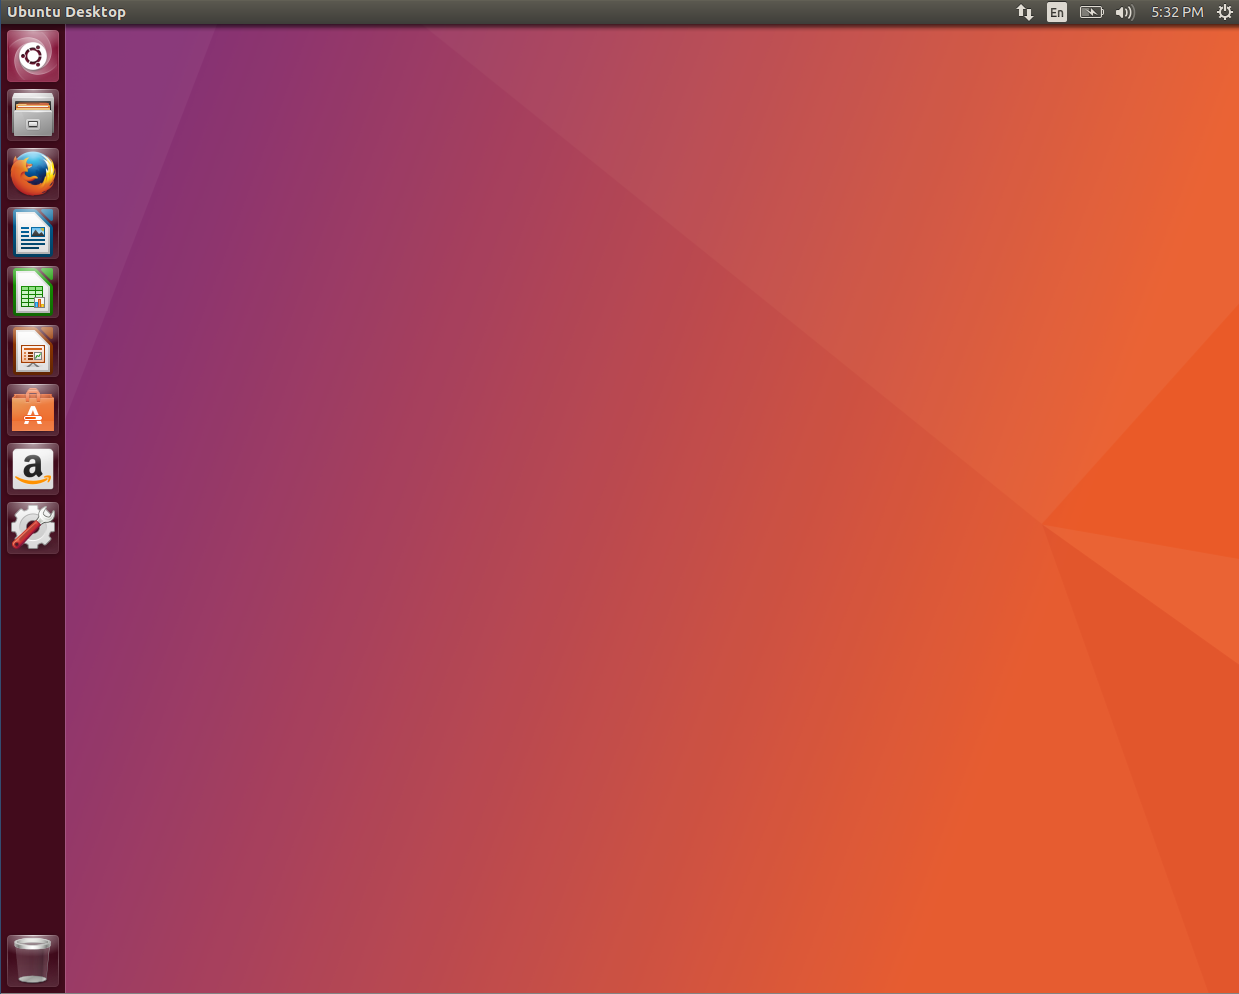
Alright let’s start with the Desktop
The first thing you’ll notice about Ubuntu is that it has a bar with pinned applications on the left side. The top and bottom icons on the bar aren’t applications. The top is actually the Application HUB while the bottom is your typical trashcan.
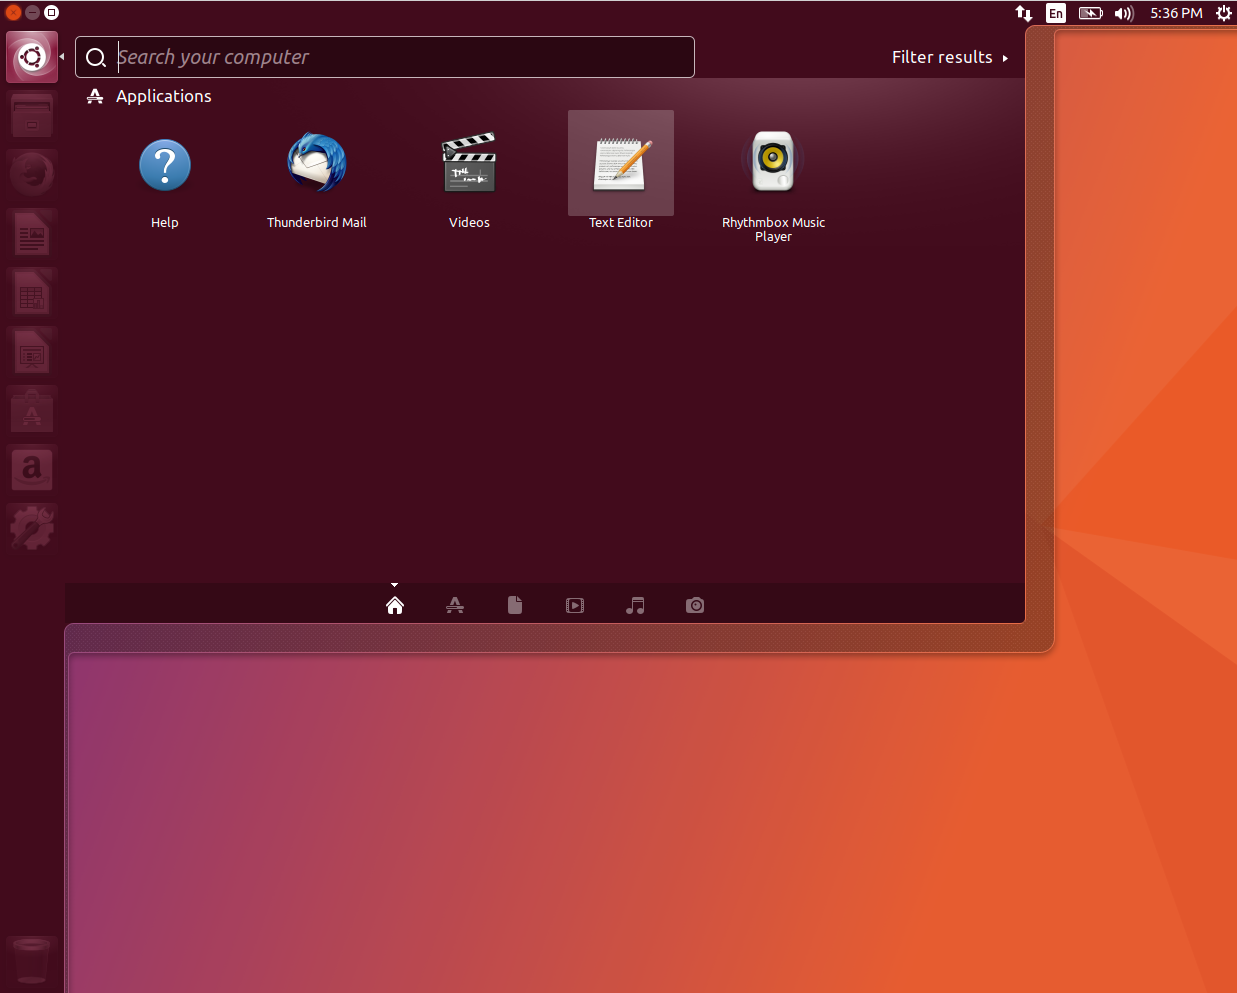
Application HUB
You can use the Application HUB to quickly find all your applications and search for a specific one by name. You can also organize the applications in various ways to help you find what you’re looking. This is useful for finding applications in cases you don’t know what they are called.
Top Bar
Back to the desktop you’ll notice that across the top there is a sort of bar with some icons on it. This bar is customizable and as a default shows icons for battery, wifi, the time, and also a quick way to get to settings.
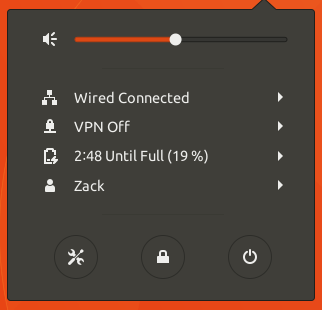
Top Bar Settings
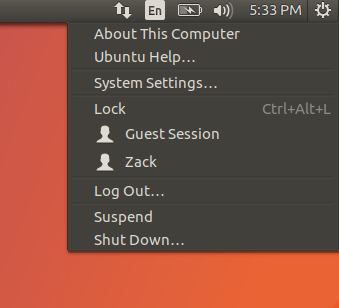
In this small settings menu, you can log out, shut down, and see information about the computer. It also has an option for opening the full settings menu.
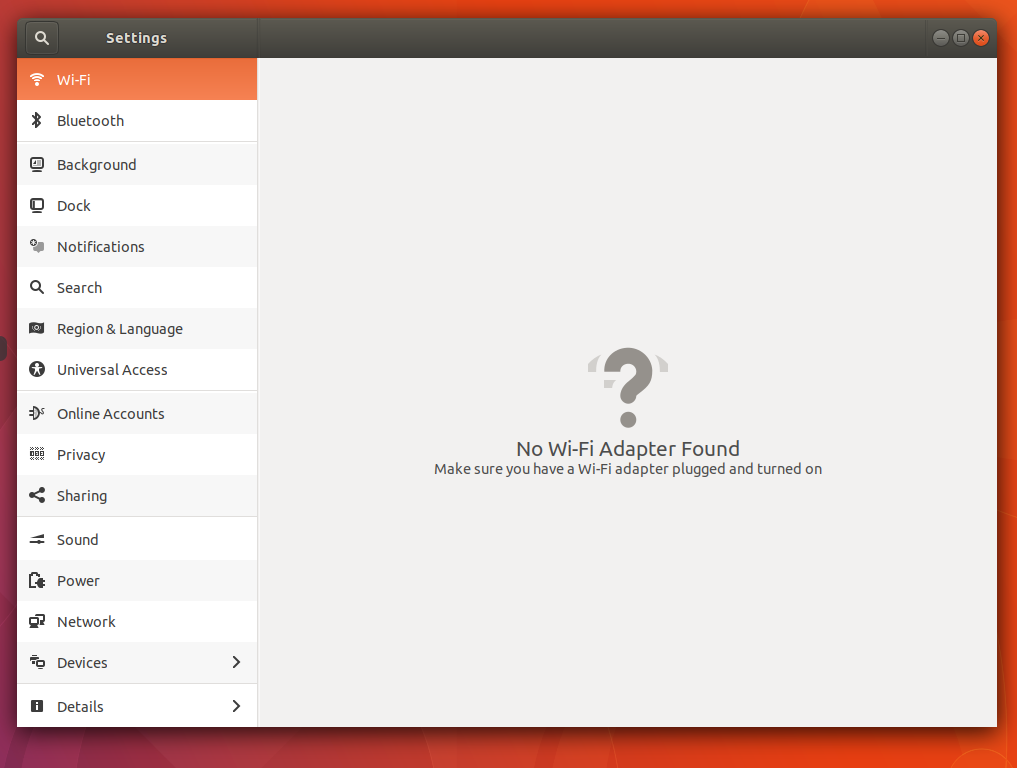
Settings
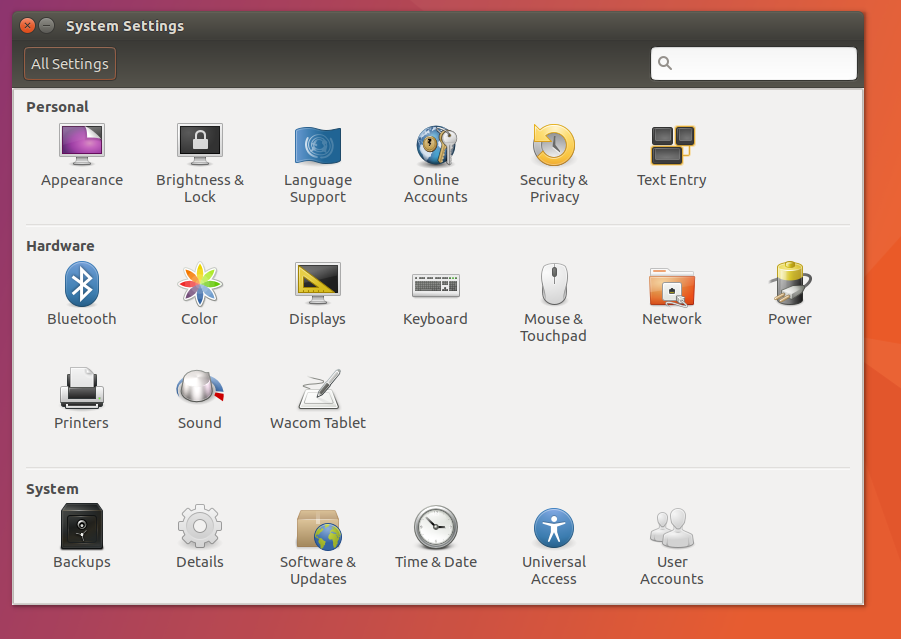
In settings, this is where you can change things like the appearance, peripheral devices, power management, accounts, etc. This is where you can add additional accounts.
Adding an Account
To add an account, click on User Accounts. In the User accounts menu, you will see a list of already existing accounts, and below you will see a set of + and - buttons. These buttons will allow you to add and delete accounts. But first, you must Authenticate yourself as the Admin. On the top right corner there is a clock. Click that to Authenticate.
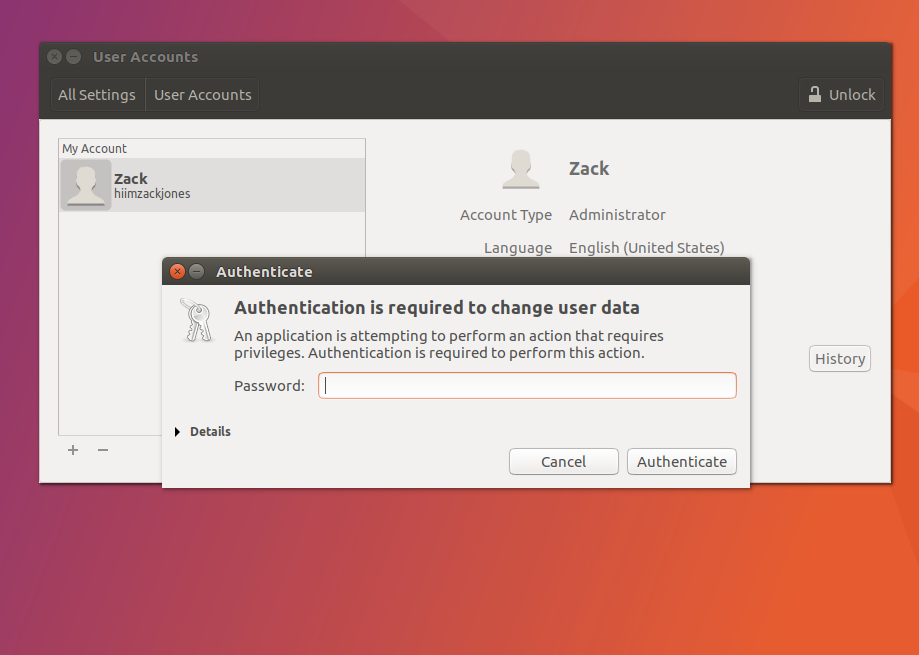
From here you can add an account and set it as a standard account or admin.
File Management
Next let’s check out the file management system. Back at your desktop, in the sidebar there is a file cabinet icon. Click that.
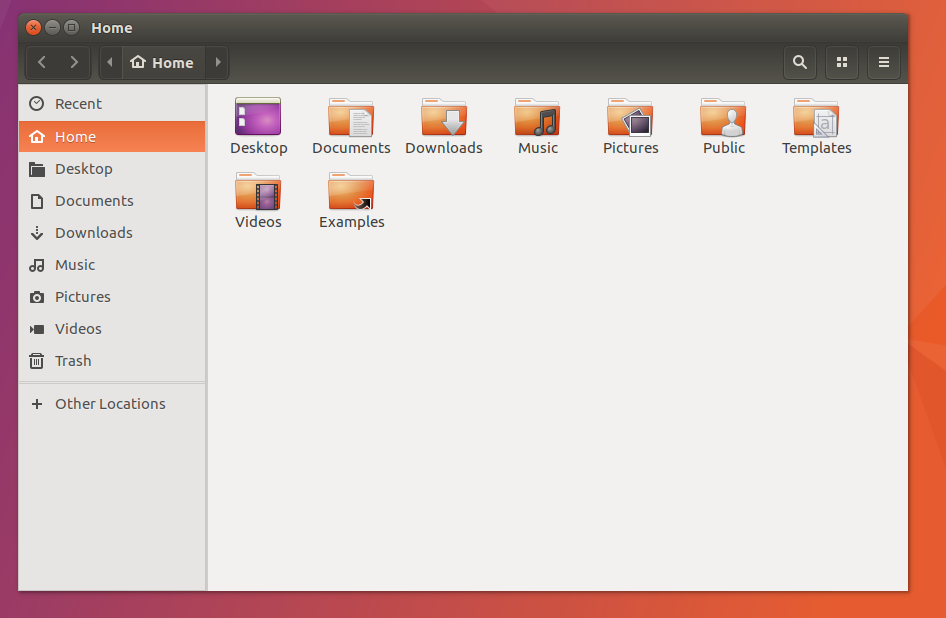
This is similar to explorer.exe in Windows or Finder in Mac. Your accounts default directories will be listed on the left side and your files and folders will be on the right. On the top right corner you can use the buttons to search for files, change out the files are laid out, and add new files and folders.
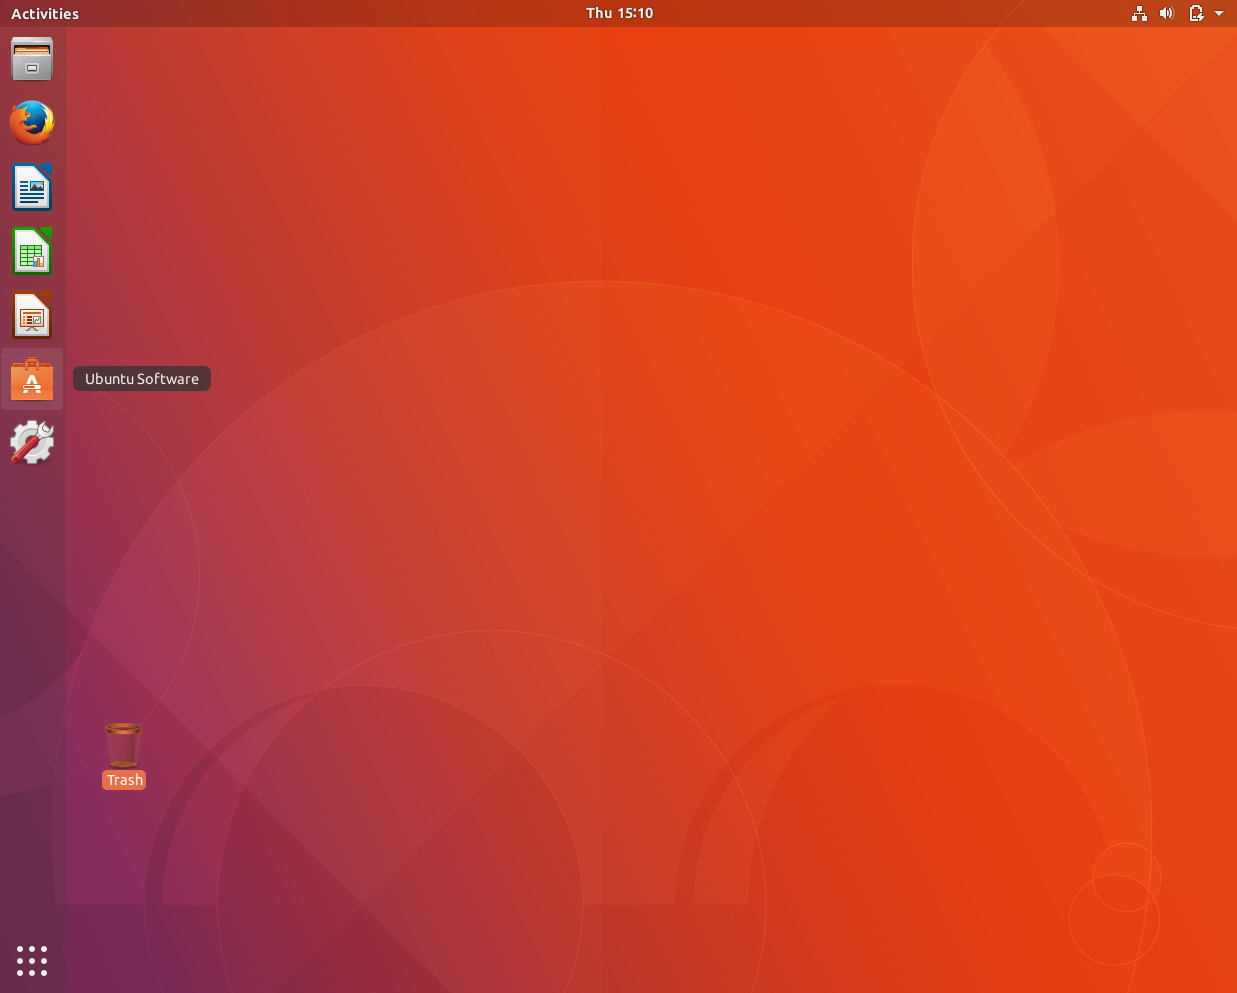
Updated Ubuntu
While putting this portfolio together, I updated my version of Ubuntu to find the interface’s layout to be much different than above. To be thorough, here are some images to show the differences.
The Desktop
The Settings
Account Settings
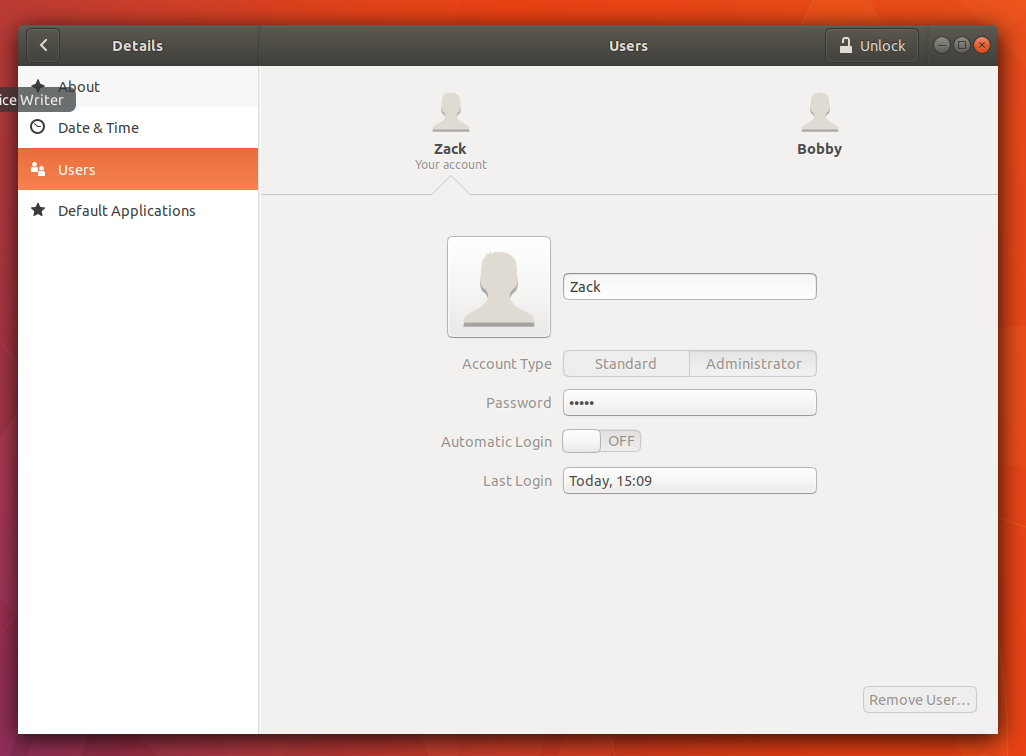
Despite the update in the GUI, the navigation should be very similar.
The Terminal
The easiest way to explain the terminal is to compare it to a chat window, or text messaging. The Terminal is essentially a way to talk to the computer using a set of commands and arguments and syntax as input and then it does work based on what you tell it, generally spitting out some sort of output for you or actions like changing settings or file manipulation. The Terminal can be found in the HUB for applications and can also be brought up using Alt+ctrl+t on most Linux Distros.
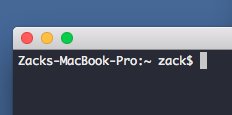
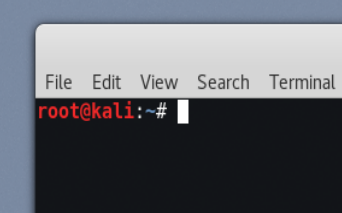
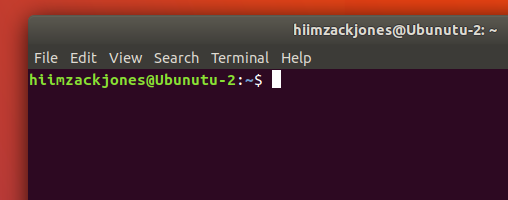
The terminal starts with a prompt. In that prompt, it gives you some information. Depending on what operating system you’re on. It may show a few different things in the prompt. Just know that generally it will show you
- The account you’re on
- The machine you’re on
- The current directory you are working in
- and a symbol to prompt you for your input. For root accounts the symbol will be # and for all other accounts it will be $.
Here are a few examples.
Working in the Terminal
The terminal take commands line by line. Commands will act like small applications or functions to do certain jobs. Like finding a file, or showing an IP route. Some commands will work fine by themselves, but many will take arguments and options. Options are exactly as they sound. Arguments are inputs that you give it, sometimes an argument is a number, or a file name, or an IP address. Each command will have different arugments and options that it will accept.
Possible command syntax
command
command --option
command --option argument
command --option argument argument2 argument3
command argument
Also options are often simplified by a single letter. For example instead of –option, the command may accept -o. These simlifications will be different. Another note is that options can sometimes be stacked on top of each other.
Here is a logical example. Let’s call it a Pseudo Command. This isn’t an actual command but you could guess what this command represents.
drive --fast --WindowsDown 58W
or
drive -f -W 58N
Imagine what this command may mean. The command says to drive. With the options of Fast and WindowsDown. It also has an argument of 58W. We could gather that this command would tell the computer to Drive fast with the windows down on 58N. Simple.
Super User do!
Sometimes when you are working in terminal, you may be issuing a command that changes some settings in the account or operating system. The OS will sometimes tell you that you do not have permission to make those changes. Whenever the terminal outputs a permissions issue, you should try the command with ‘sudo’ at the start. This tells it that you are looking to make the changes as an Admin. It will ask for a password and then continue running the command you’ve issued. To follow with the previous example: sudo drive --slow --AC Route66
Moving Around in Terminal
Some of the first commands that you should learn are commands to help you move around within the file system, much in the same way that you would click through folders to find files. The following commands are for moving around and looking through directories.
pwd
pwd
PWD stands for Print Working Directory and will print out onto the terminal the Directory (folder) that you’re currently in, as well as the directories that it sits in. So if you have a folder named MyFolder in a folder named Files in a folder called Everything, it may look something like Everything/Files/MyFolder. Of course the EverythingFolder is most likely sitting within the user’s file structure. For example it may be on your Desktop within your User files.
For example: /Users/zack/Desktop/Everything/Files/MyFolder
ls
ls
ls -l
ls -la
Another terminal command that will help you move around between files is the ls command. This command is simple. It lists all the files and directories in the current working directory. just type ls with no options and press enter. You can also use the -l option to get additional information like the user and ownership of files as well as the time it was created and the permissions. You can also use the -a option to get all files including hidden files.
For example, here are a few ways to use ls.
Zacks-MacBook-Pro:MyFolder zack$ ls -a
.		..		Folder		HomeWork.txt	picture.jpeg
Zacks-MacBook-Pro:MyFolder zack$ ls -l
total 0
-rw-r--r--  1 zack  staff  0 Nov  6 14:44 Folder
-rw-r--r--  1 zack  staff  0 Nov  6 14:44 HomeWork.txt
-rw-r--r--  1 zack  staff  0 Nov  6 14:44 picture.jpeg
Zacks-MacBook-Pro:MyFolder zack$ ls -la
total 0
drwxr-xr-x  5 zack  staff  170 Nov  6 14:44 .
drwxr-xr-x  3 zack  staff  102 Nov  6 14:31 ..
-rw-r--r--  1 zack  staff    0 Nov  6 14:44 Folder
-rw-r--r--  1 zack  staff    0 Nov  6 14:44 HomeWork.txt
-rw-r--r--  1 zack  staff    0 Nov  6 14:44 picture.jpeg
cd
cd Directory
cd Directory/Directory2
cd ../
cd ~/Users/Me/Desktop
The cd command stands for change directory. This command will allow you to move into different directories. It takes various types of arguments to help you move forward and backward and laterial. You can even move recursively down into directories. The arugment for cd needs to be relative to the current working directory. For example if you are currently in a folder named ‘Cars’ and within that folder there is another folder called ‘Hondas’ you would simply cd Hondas. You can also move back through folders by using cd ../ where the dots represent the previous directory's name. So if you wanted to move back two directories you could use ../../. You don't have to type the name of the directory because it is implied. Also, if the directory you are in belongs to a directory that has other directories, you can move laterally by using ../OtherFolder
Lastly, you will often want to use the
The use of ~ allows you to type an exact directory address regardless of what your current working directory is. So even if you are in Users/Me/Documents/Homework you could use cd ~/Users/Me/Taxes/2017/W2Files and move directly to it.
Making and Removing Files & Directories
The next few commands are the basic commands for creating new empty files and directories. This is similar to File -> New Folder/text document or right clicking to do the same job in Windows or even in Mac. Learning these commands will help you do things like organize your files as well as create packages as a developer.
touch
touch newfile.txt
touch NewCode.js index.js data.json
touch emptyFile
The touch command is for creating empty files in the current working directory. The files can be any format with any extension. For example, creating a blank text file you would just touch MyText.txt or if you were planning to write Python code that will need a couple files to work you might create them all at once using touch MyCode.py MoreCode.py The touch command has a few options that are available to allow for timestamp modificaton.
mkdir
mkdir DirectoryName
mkdir FolderOne FolderTwo
mkdir -p This/Will/Make/These/Directories This/Will/Make/Only/These/Last/Two
Similar to touch, mkdir creates empty directories in the current working directory. You can create multiple directories as well just by putting spaces between the directory names. The -p option creates directories within directories as long as the parent directories don’t already exist.
Using the above example of
mkdir -p This/Will/Make/These/Directories This/Will/Make/Only/These/Last/Two
this is what the directory structure will look like.
.
└── This
    └── Will
        └── Make
            ├── Only
            │   └── These
            │       └── Last
            │           └── Two
            └── These
                └── Directories
rm
rm FileINeedToDelete.txt
rm FirstFileToRemove.c SecondFileToRemove.jpg
Once you’ve learned how to make files and folders, it’s important to know how to remove them. The rm command removes files. It can be used to remove Directories as well, but there is a special option for that. To use rm, make sure you are in the current working directory of the file, and pass the file name as an argument to the rm command as seen above.
rmdir
rmdir EmptyDirectory
rmdir -rf DirectoryWithFilesAndSubDirectories
Similar to rm, rmdir removes directories. This command without any options will only remove directories that are empty. If you’d like to remove a directory with it’s contents, you must use the option -r or more efficently -rf.
Installing packages with apt-get
apt-get install packagename
apt-get update
apt-cache search .
dpgk -l
A vital tool that is utilized in most versions of Linux is the apt-get. APT stands for The Advanced Package Tool and is used to quickly install command line tools. These tools are prepackaged together to make it easy to install. This can be useful for admins to quickly add applications on multiple computers using scripts. To install packages simply use apt-get install ThePackageName and follow the prompt. You can update the list of packages using apt-get update. If you’re interested in searching through the repository of available packages, you can use apt-cache search PackageName or look at all of them using apt cache search . And finally you can list the packages that have already been installed buy using dpgk -l.
It’s important to note that each distrubution of Linux may use a different repostories for packages. For example, the popular penentration testing Linux Distro - ‘Kali’ uses a unique repo with specialized networking tools.
Additional Terminal Commands & Tools
man
man rmdir
man touch
The man command is used to read information about commands to learn what options and syntax to use with the command. It gives examples and is a great resource for learning more about a command. Pass the name of a command into the man command to read it’s contents.
grep
grep "Looking for this literal string" InThisFile
grep -i "ThIsWiLlBecAsEInsenSITive" Inthis
Grep is a funny sounding command that does a lot of searching magic. The grep command has loads of options and ways to use it to search within files or even output from the terminal. This can be useful if you are looking through multiple files for a paticualr string of information. For example, let’s say you have 3 files with a list of first and last names in it. People1.txt People2.txt and People3.txt. You could use grep to find all the names that have the last name of Richards using this example grep:
grep Richards People*.txt
This command will search for any lines with the word ‘Richards’ in it in any file staring with People ending with .txt. It will then print out just those lines.
note: the use of * in an argument signifies a wild card. The wildcard is basically a placeholder for any character. Meaning it can represent multiple files.
You can use the -i option to tell grep to find strings even if the letter case is different. The above example:
grep -i "ThIsWiLlBecAsEInsenSITive" Inthis
Would output the strings ‘thiswillbecaseinsensitive’ as well as ‘ThisWillBeCaseInsensitive’ even though the cases do not match.
Find
Find thing
Find -name "ReallyImportantFile.txt"
The Find command will search recursively based off of a regular as an argument. It will take wild cards as part of the input and can be used to find any files with paticular keywords.
Cat
cat Code.py
cat logfile.txt
Cat will echo out the contents of any file including text files, binaries, and scripts. This is similar to using Vim but doesn’t let you edit the code. Often used with a grep and a pipe: cat file.txt | 'keyword'
Vim
vim program.c
Vim is a CLI based editor for writing text files, scripts, and code in various languague. Vim can recognize file types and have syntax highlighting.
Other terminal based editors are available and are popular. Some of these editors include: Nano, Emacs, gedit.
pipe ‘|’
The pipe character is used to pass output of a command to another command. As seen above a popular combination would to to cat out the contents of a file, then using grep on that output to filter out paticular lines.
cat logs.txt | grep 'error'
Using $() to nest commands
Use $() to nest a command within a command. For example Dothis $(ToTheOutPutOfThis)
File Manipulation with >,», <,and «
> for pushing output of a command into a new file. Overwriting existing content if it’s an exisiting file.
>> for pushing output of a command into an exisiting file, appending the content it already has.
Networking
Basic Networking Concepts
- On Site
IP addresses and Subnets
http://hiimzackjones.com/networking/2017/09/20/IP-Addresses-Subnets-And-Binary-Part-1.html
http://hiimzackjones.com/networking/2017/09/26/IP-Addresses-Subnets-And-Binary-Part-2.html