Installing And Setting Up Windows Server 2016 & Server Core
Installing and Setting up Windows Server 2016
Overview
Installing Windows Server 2016 is very similar to installing other Windows versions. This won’t be hard. Don’t panic. I added copious amounts of gifs to help you.
Requirements
First off, if you check the requirements for installing server like you should, you will see something like:
- 1.4 GHz with 64 bit architecture
- 512 MB of Ram or 2 GB if you’re using the Desktop Environment.
It’s important to take in consideration what the uses of the server will be. It’s not uncommon for a server to run Hyper-V with multiple clients, Active Directory, and a handful of other services. It’s a good idea to take in consideration and even plan the server’s roles and needed resources for it to handle it’s job. Windows Server with the Desktop Environment will have a hard time running on 2 gigs of RAM. For example, the server setup I’m working on at home will have a 1 TB HD, and 16 GB of ram with something like a 2.4 quad core processor. Long story short, Minimum requirements aren’t something you should ever worry with unless you’re doing something like testing out installs or building on a budget. The server should have the resources it needs that fits your (or your clients) budget while doing the intended jobs.
Picking the right version
There are a few different flavors of Windows Server 2016 and at first it can see confusing. Here is the breakdown.
- Windows Server Essentials
- Windows Server Standard
- Windows Server Datacenter
- Microsoft Hyper-V Server
- Windows Storage Server 2016 Workgroup Edition
- Windows Storage Server 2016 Standard Edition
With or without the GUI
While you may be used to doing things with GUI because you can’t quite remember where to go to change the background, or change your password and you like to have some visual clues, a GUI can take up resources as well as can give attackers plenty of running features to poke at. This is where Core comes into play. Core is a fully functioning version of Server that reduces the attack surface and can be easier to install and deploy between machines. We can get into that later.
A quick overview of Nano
The smallest and newest of the Server options is Nano. Nano Server is a headless essentials system for managing remotely. Nano has a very small footprint but isn’t as easy to manage as Core. Nano Server is meant specifically for running “born-in-the-cloud” applications and containers.
Headless meaning it’s a server without a monitor and keyboard and peripherals. Specifically meant to be logged into to manage.
Born-in-the-Cloud is a term that describes applications that are designed specifically for the cloud or cloud computing. Essentially replace the word cloud with “internet” and you’ve got it. These applications live online in servers instead of on your harddrive. Applications are becoming born-in-the-cloud more and more often due to it’s ability to scale and be dynamic over time.
Containers are a technology similar to Virtual Machines in the sense that the files or applications in the containers are separated from the rest of the working environment. This protects it’s neighboring applications as well as itself. This comes in handy when prototyping and developing a cloud application that will reside alongside developed applications.
Installing Server w/ Desktop Environment
Alright the install.
1) Pop in the Flash Drive or DVD or find the ISO and boot into it.

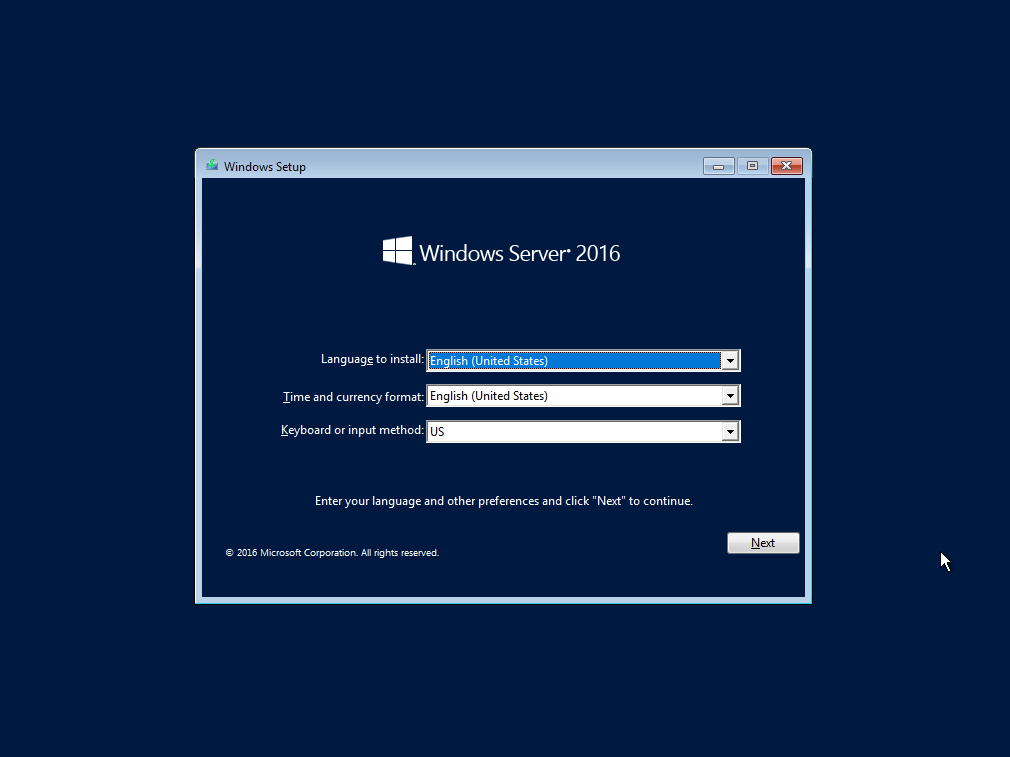
2)Windows setup window will ask you some info so that your keyboard works and that it speaks your language.
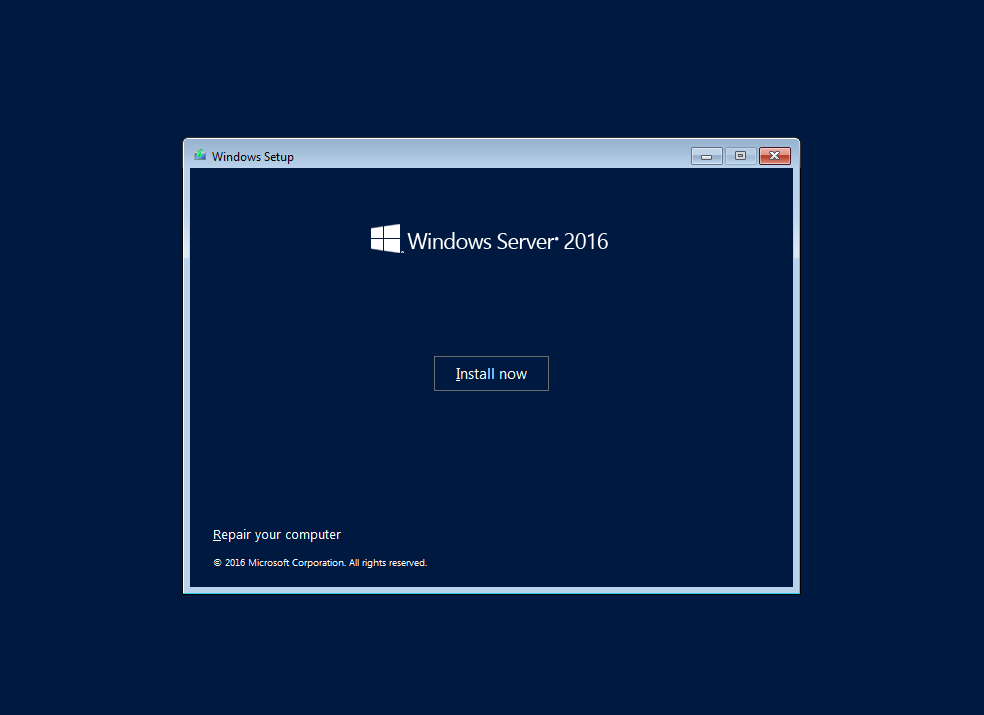
3)Tell it to install.
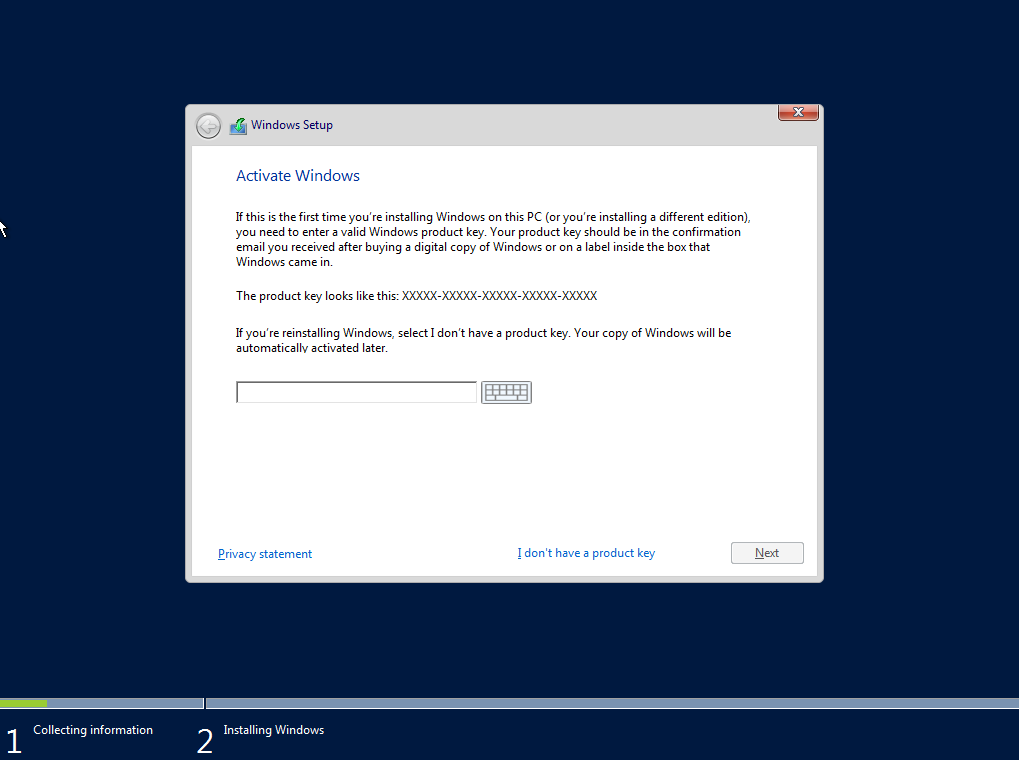
4)Put in your activation code or skip it for now
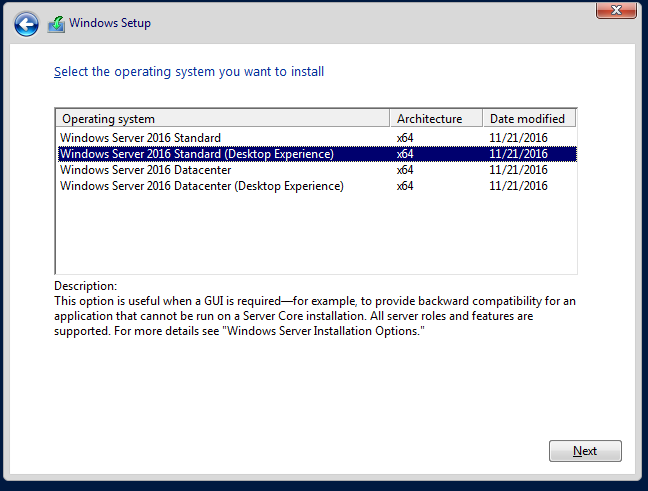
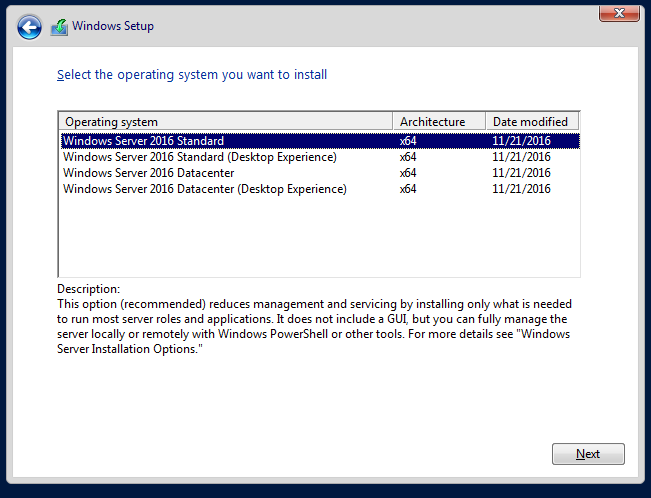
5)Pick the version you’d like to install. In this case we want to Desktop Experience and we won’t be needing the ever expensive and large Datacenter version.
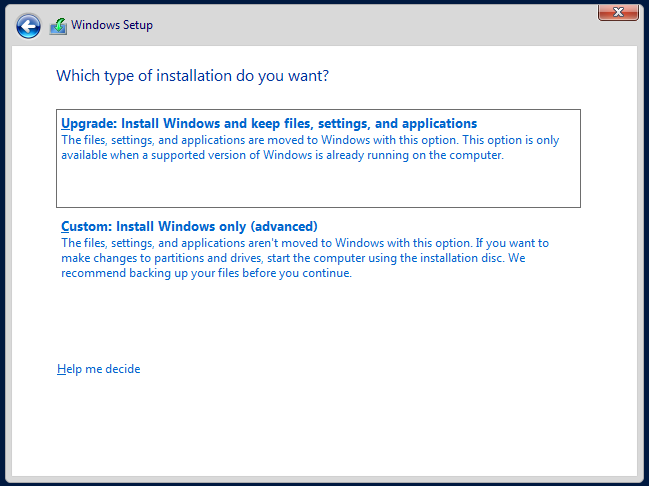
6)Custom install for a fresh install, or Upgrade if installing on top of an existing version of Windows
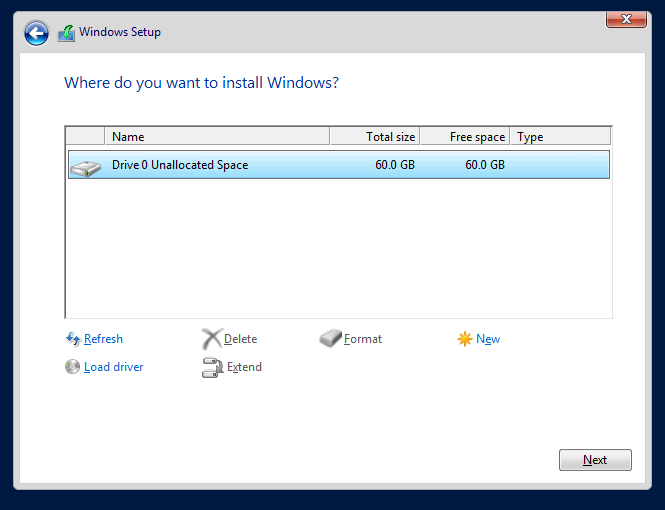
7)Pick the volume/partition you’d like to install to or let the installer format how it’d like. In this case I erased all existing partitions by clicking them and deleting, leaving an unallocated space. Choose where you’d like to install and click next. If you’d like to create a separate partition, do that here now by clicking new.
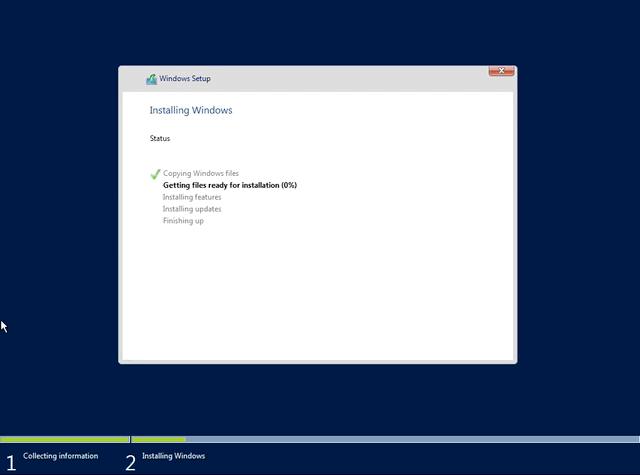
8) Wait for the install to complete and restart. This could take a bit of time.
9)Let it think. This isn’t actually a step, but I made a gif for it anyway so here you go.
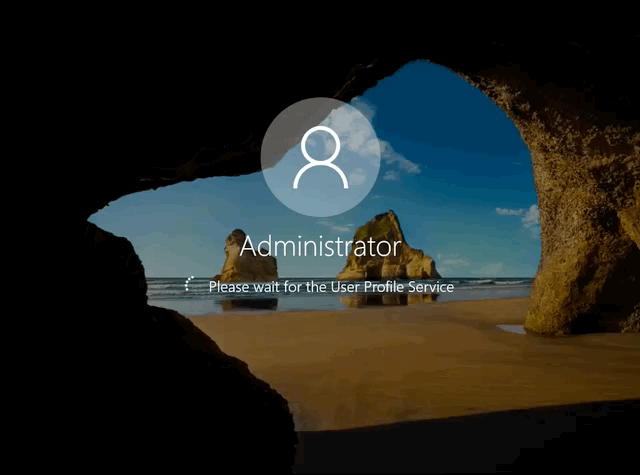
10)I don’t have a screenshot for this, but I’m almost certain it asks for you to setup a password at this point.
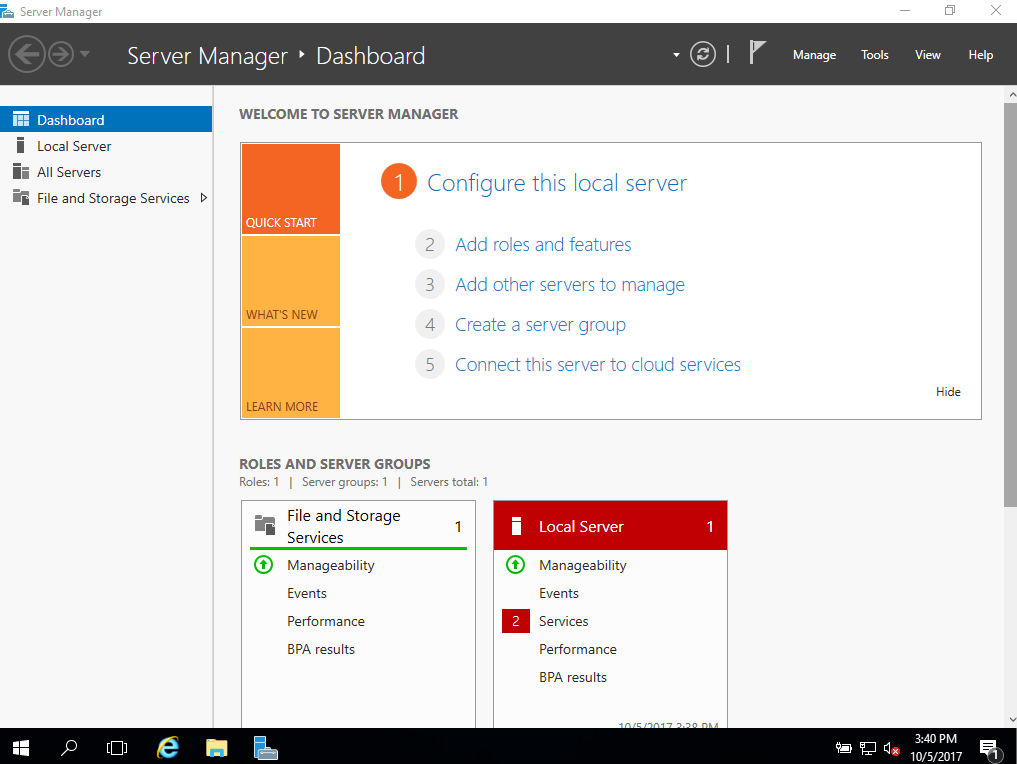
11) Once logging in, you’ll be sitting in front of Server Manager. It will look like this.
Basic setup
Now before you can use server there are a few things you’re going to want to do to get it setup. Being a server, it’s going to… serve and the clients that use those services will need to know where to find it. So you’re going to want to set up a static IP right out of the gate. Let’s do that now.
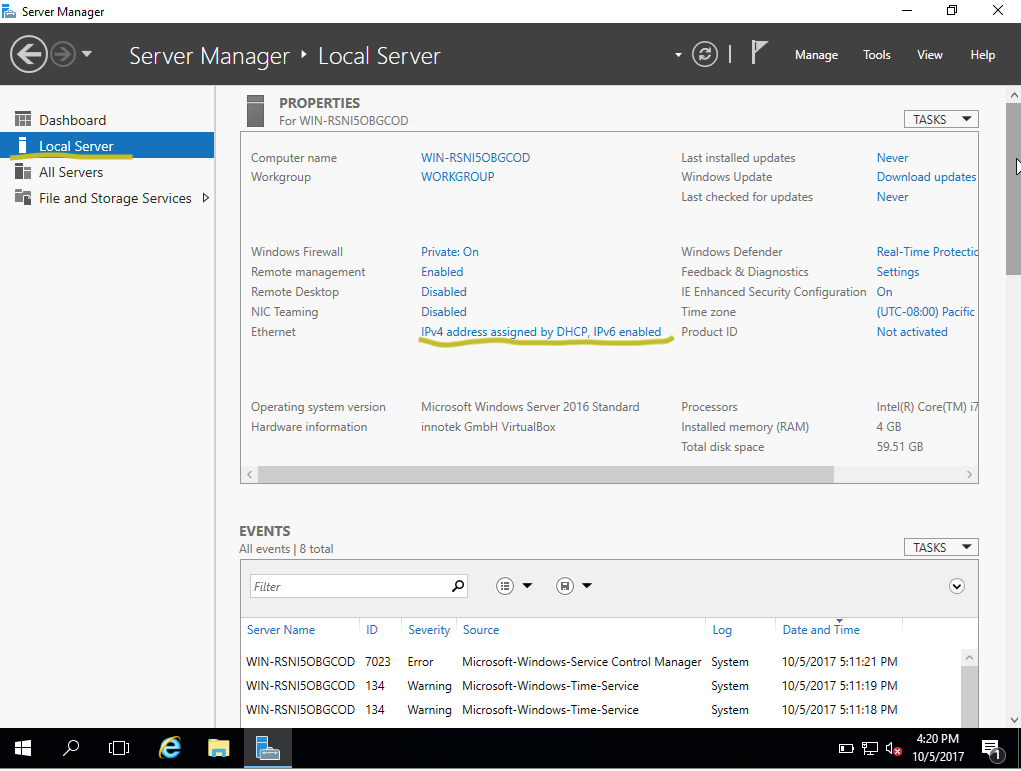
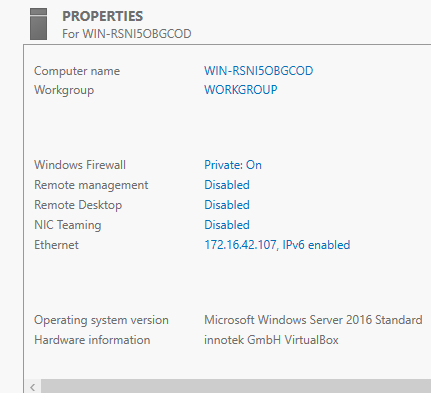
1)In Server Manager, to get to your IPv4 settings you need to be in the Local Server section. There you will see the Properties and a section called Ethernet. Most likely, you will see that the server has IPv4 assigned by DHCP and IPv6 enabled.
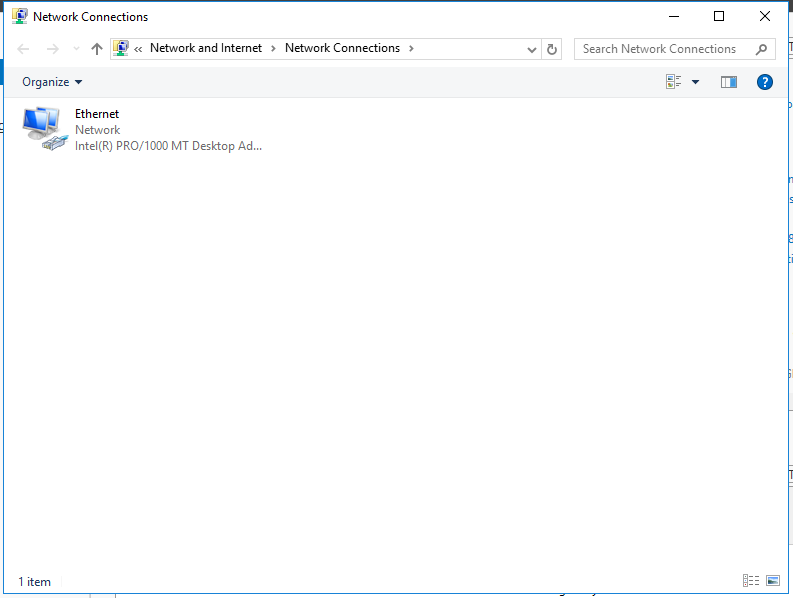
 2)Click to open up the list of interfaces available for your machine. You may have more than one interface available. My machine only has one.
 3) Right click and click on properties. From there you will see an option for IPv4. Double click or right click it to open the IPv4 options.
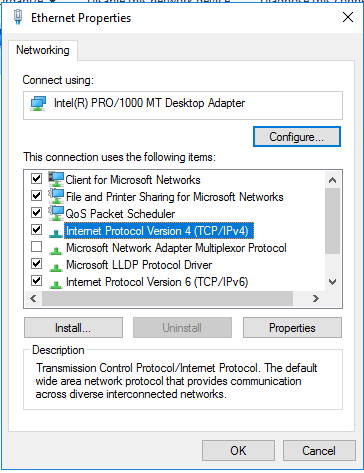
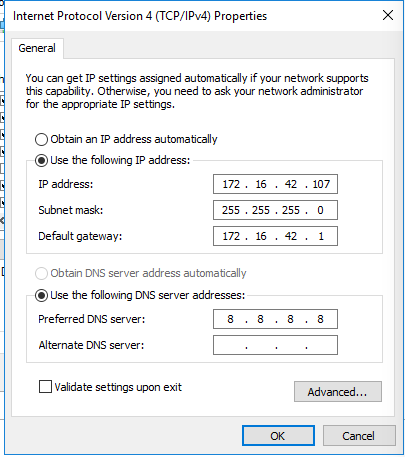
4) Choose Use the following IP address: and enter in your information. On my network I will bet setting it up with a Class C IP address with 107 as it’s host number. Make sure to give it a Default Gateway as well as at least one DNS. If you don’t have a DNS setup, you can just use 8.8.8.8
5) You should see that in the Server Manager under properties, the ethernet section is updated.
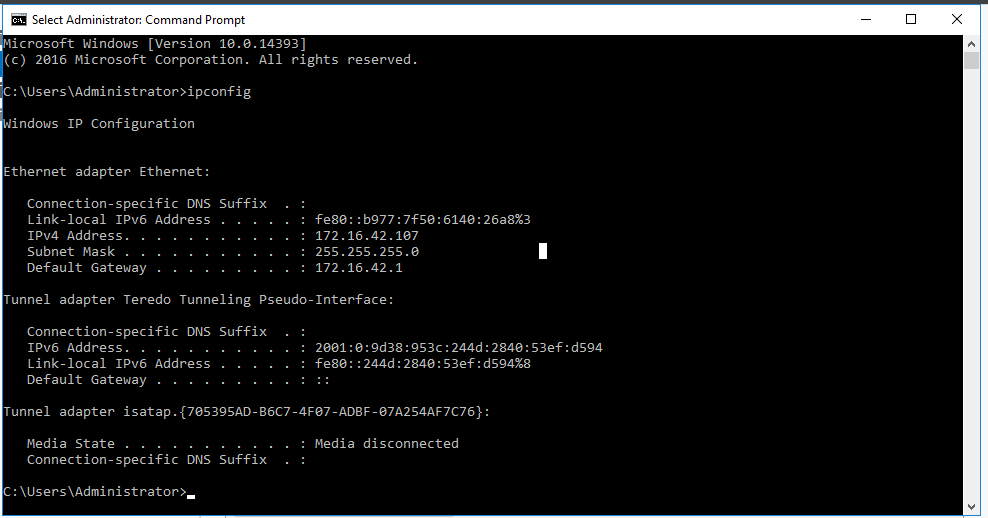
6) You can do an ipconfig from the command line to make sure it worked. I’d also suggest pinging the gateway as well as another machine running on the network to make sure. Because ping as you go.
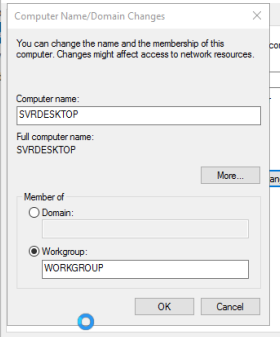
 7)You may notice your hostname is something funky. Go ahead and change that. Back at the Properties section in the Sever manager, click on the Computer Name link at the top.
8)Notice that there is a section for description and a separate button for changing the name.
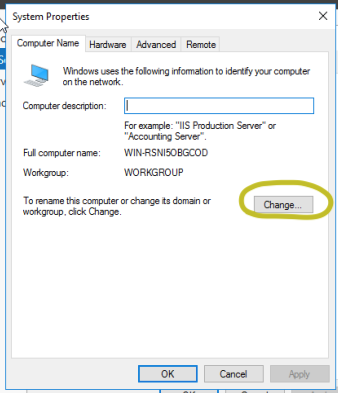
9)The Computer Name/Domain Changes window will pop up. Go ahead and change your computer name to something meaningful. For now leave the default workgroup. We will talk about domain stuff later. You’ll have to restart after that.
That’s all we will do for now.
Installing Server Core
It’s important to talk about Server Core because in many cases, you may be thrown into a pre-existing environment and if you’ve never at least experienced Core, it may be overwhelming.
1)Follow the install steps as you would for Desktop, but pick the Standard without the Desktop Environment. This install should take much less time than the Desktop Version we just did. I set this core server up with 32 GB on the HD and 800 MB for RAM.
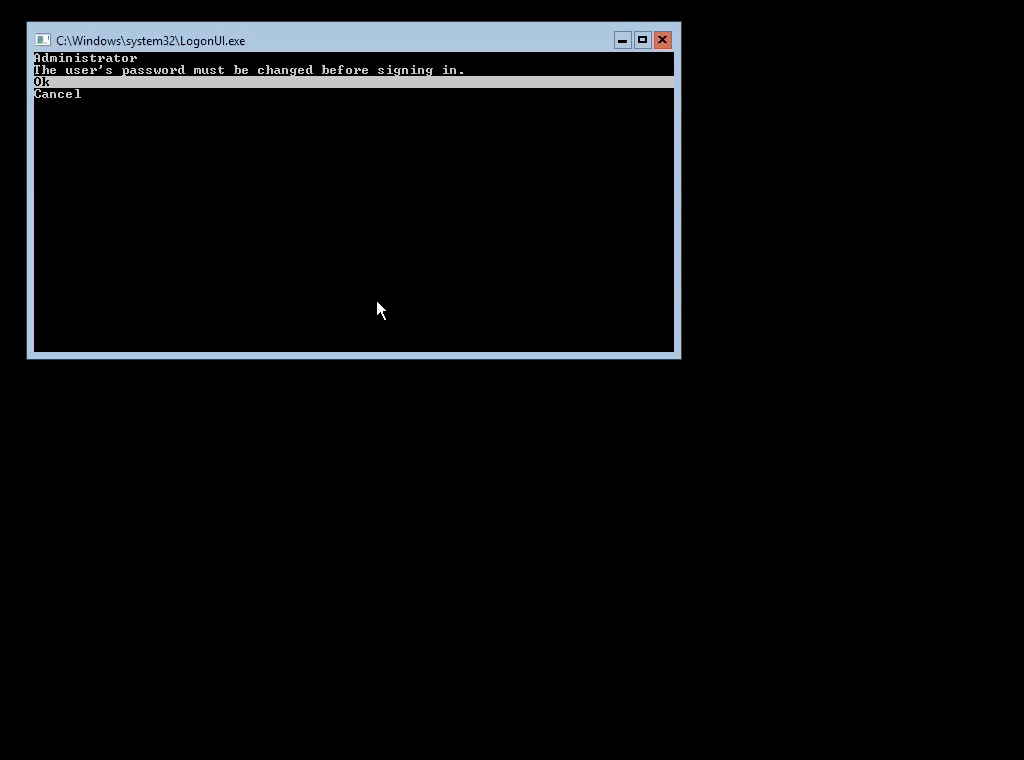
2)Once the install completes, it will prompt you to change the admin password before it starts up. G
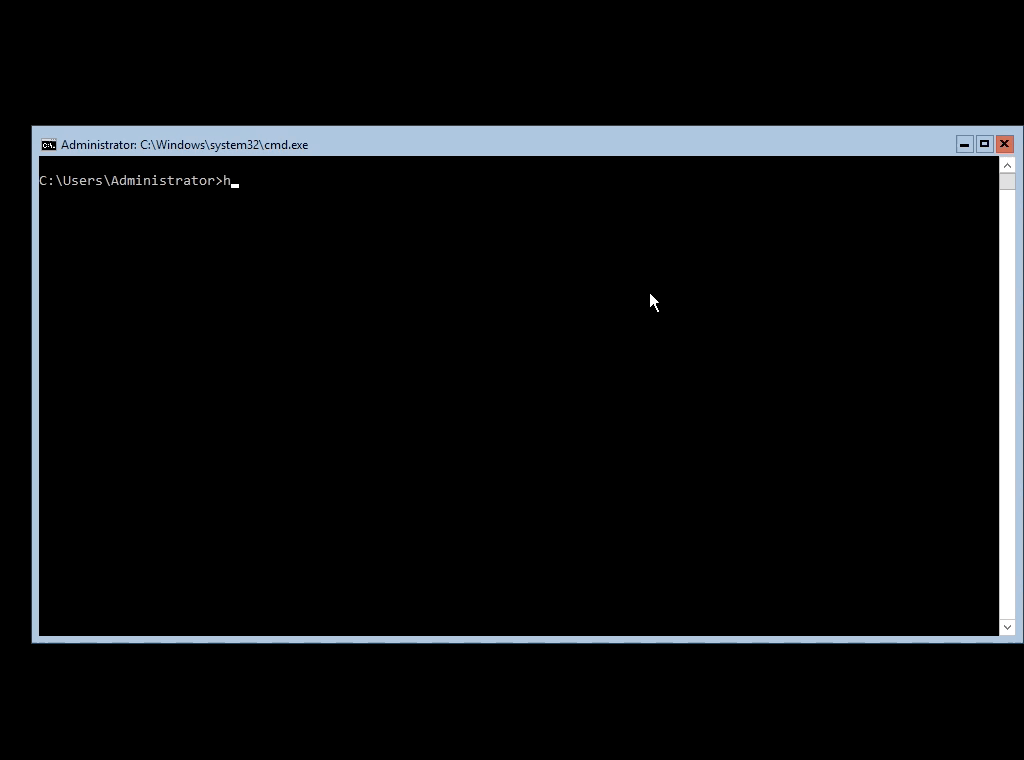
3)You’re done installing. Simple stuff. Notice that Core is just a CLI, similar to DOS. To see the available commands, you can run help.
4)The next thing you might want to do is to check the system information. To information about your machine like it’s boot device, domain, architecture, NICS, and Hyper-V just run a systeminfo command and give it a moment to get it’s life together.
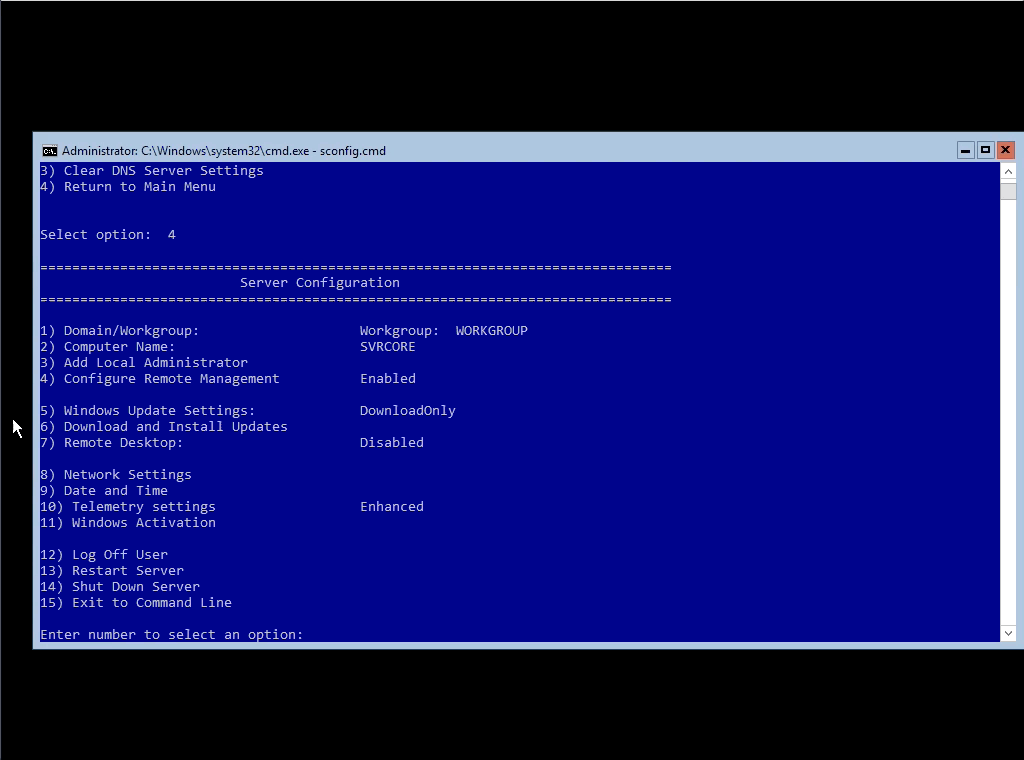
5)Now that you’ve poked around. Let’s go ahead and actually configure some things on Core. Much of the configuration for the server itself can be done from a command called sconfig. Go ahead and run that now to see what it looks like. Note: sconfig has to be run using sconfig.cmd. This is because sconfig is a batch file that is designed to be interpreted by the command line.
6)Once you open it you may notice that sconfig has a simple menu system. You choose options by typing the number in. The options should speak for themselves. Set up the hostname for this machine by picking option 2 and giving it a name. It will restart when you are finished.
6)Like we did with the desktop version, we will need to set this server up with a static IP. Sconfig is where you would do that.
- Press 8 to setup Network settings
- pick your NIC by it’s respective number
- Press 1 to setup the NIC’s address
- Press S to setup as a Static IP
- Enter the IP
- Either type the subnet mask or leave it blank for 255.255.255.0
- Enter the Default Gateway.
- Press 4 to wrap it up and return to menu.
That should get you started. Thats installing two different kinds of Windows Servers and setting their IP addresses and their hostnames. Another important server option to install would be Nano, but I plan on dedicating a whole post to Nano by itself.
Okay done and done. Thanks for reading this far.
Cheers, Zack Jones.