Nano Server Overview And Install
You can find more information about Windows Server 2016 and Server Core in a previous post … This previous post to be exact.
Overview of Nano Server
Nano Server is a unique way to install a server machine with a lightweight footprint that allows for remote management similar to Core, but is even more lightweight than Core. Nano Server works well with cloud based development and running “born-in-the-cloud” containers or applications. It’s a headless install, meaning it’s a server without a monitor and keyboard and peripherals. It’s specifically meant to be logged into to manage.
The Benefits of Lightweight
The purpose of Nano is to be light weight and it’s base footprint is a remarkable 460 megabytes. The small footprint allows for better security, quick install times, fast restarting, less resource use, etc. Windows Server 2016 is typically much heavier than it needs to be for running things like micro-services, ‘cloud-native’ applications, containers, etc. Nano is sufficient for services like DNS, small web server (IIS), and being a storage host for a Scale-Out File Server.
Nano Server for Developers
Nano comes Cloud-ready as an application and development platform.
Developing on Nano allows you to have a single ‘machine’ for that particular app, minimizing any dependencies or libraries on that particular box. When using something like a Windows desktop machine, often a developer will be working on multiple projects, all with a multitude of frameworks dependencies, and APIs as well as all of the extra clutter the machine naturally has. Packaging on Nano is simple and clean using Nano’s Windows Server App installer (WSA) and it’s built in package management system similar to apt-get or npm. Using Nano Server for development allows you to configure the machine with specific intentions - be it deployment, development, testing, or production. In theory, multiple Nano Servers can be setup, one for each particular stage in your development process or workflow. Additionally, security can be a major concern for developers, and as mentioned above, Nano is inherently secure due to it’s minimal footprint. Additionally, frameworks like Node.js can also be easily installed and ran on top of Nano.
Ways Nano Server Can Be Ran.
Nano Server is headless, but can be ran as OS in multiple ways inlcuding through a VM, Hyper-V containers, or on physical hardware as Host OS. It can also be accessed remotely.
The Nano Server Image
A unique feature of Nano server is the the need to inject roles and features as you build the OS image for whatever use case you may need. In other words, if you are planning to use Nano server as a DNS server only, there would be no need for the OS to have SoFS services and features as part of the OS image. Each time a Nano Server machine is created, the image should be built for that machines needs.
Installing Nano
In this example we will be installing our Nano Server as a VM on Hyper-V with an image setup for webserver IIS feature included. Nano Server is installed using the NanoServerImageGenerator scripts imported as a module in PowerShell. The NanoServerImageGenerator scripts can be found on the Windows Server 2016 installation media.
To setup for the creation of the Nano image, create a directory somewhere on the server. For example in Documents create a folder called Nano. Paste the scripts into that folder.
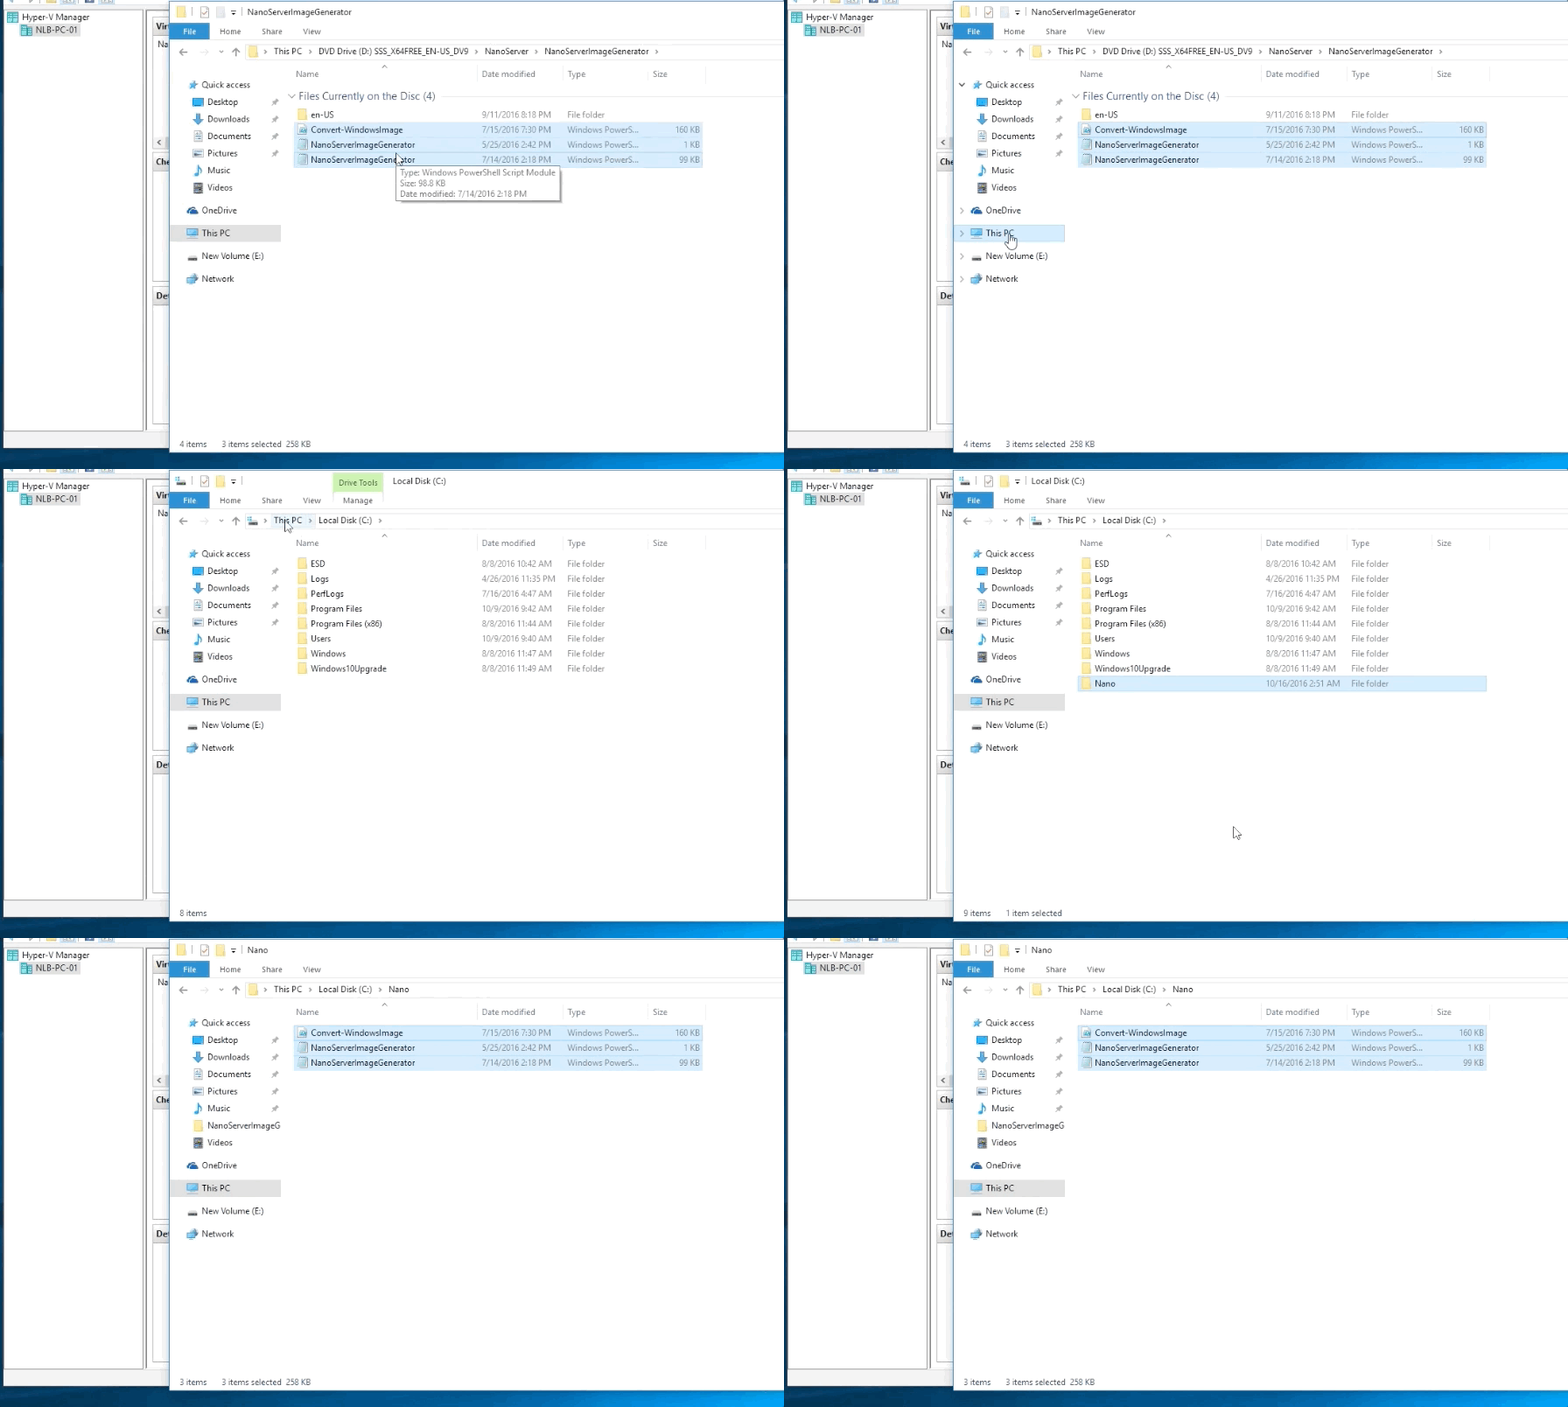
Next run Powershell as admin and import the module. Move to the directory that the scripts are in and run the following command.
Import-Module ./NanoServerImageGenerator.psm1 -Verbose
The Verbose option allows you to see the progress as the module is setup. This switch is optional.
Once the module is imported, you will run a script to create a new nano server image. Depending on what type of image you’d like to create, some of your options made be different than the example.
The MediaPath in this example refers back to the installation disk on drive D. The BasePath is for setting a temp location for configuration files. The target path is where the image file will be created. In this case, we will use the extension of .vhdx for our virtual machine. We should also set the Deployment type as Guest since it will be a guest machine on Hyper-V.
New-NanoServerImage -Edition Standard -MediaPath D:\ -BasePath C:\Nano -TargetPath C:\Nano\NanoServer1.vhdx - DeploymentType Guest -ComputerName My-Nano-Server -storage -Package Microsoft-NanoServer-IIS-Package
It will then prompt you for a password. PowerShell will then show progress in the top of the window with a green status bar.

Once this is complete, you will now have a virtual disk that is ready to be brought into Hyper-V and booted up. I’ll have another post for creating virtual machines on Hyper-V. Here is a quick outline of the process.
-
To make use of Nano Server, you will want it to have a network setup. Create a Virtual Switch in Hyper-V.
-
Create a new Virtual Machine in Hyper-V by clicking New and then Virtual Machine in the Actions bar of Hyper-V.
-
Set up the new machine with a name and desired settings. Note: In most cases you will want to set up this machine as a generation 2 machine.
-
Instead of creating a new virtual disk, use an existing disk and choose the image that we just created.
Start your machine.
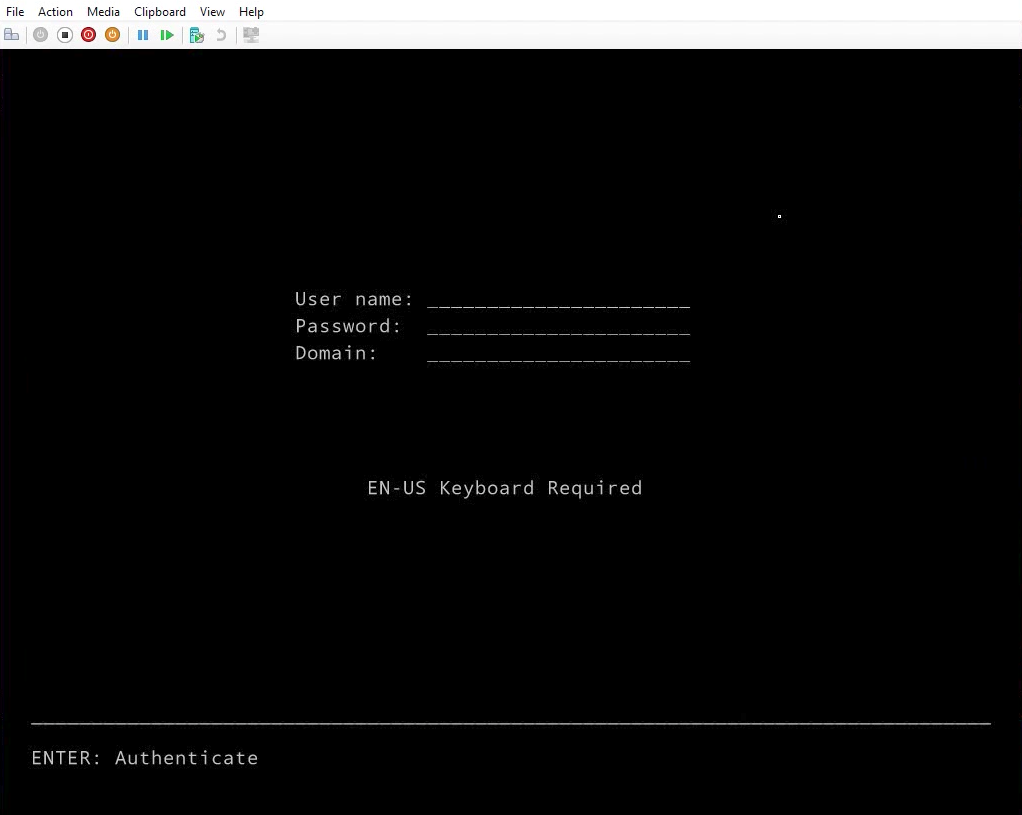
This is the starting point of the Nano Server’s console. You will want to set up the machine as Administrator first. Login using the user-name Administrator and the password you set earlier when you were creating the image. You will not need to connect it to a domain at this time. (We haven’t set that up yet)
Go ahead and set up the network settings similar to how you would set up a typical machine in the interface’s properties and then IPv4.
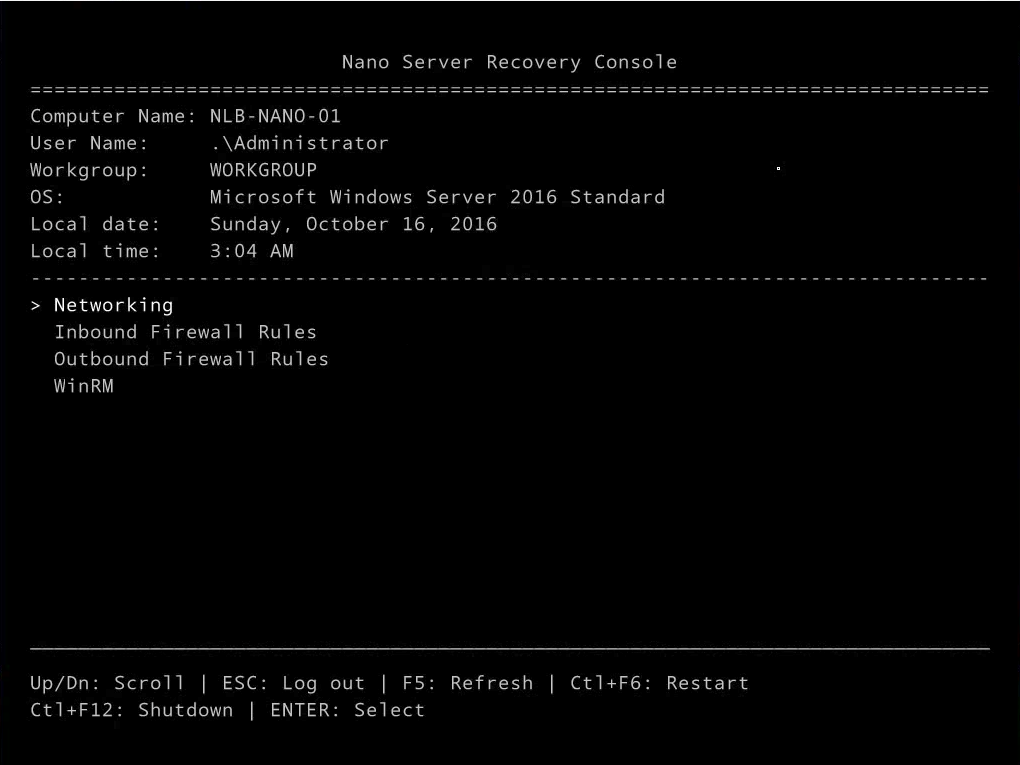
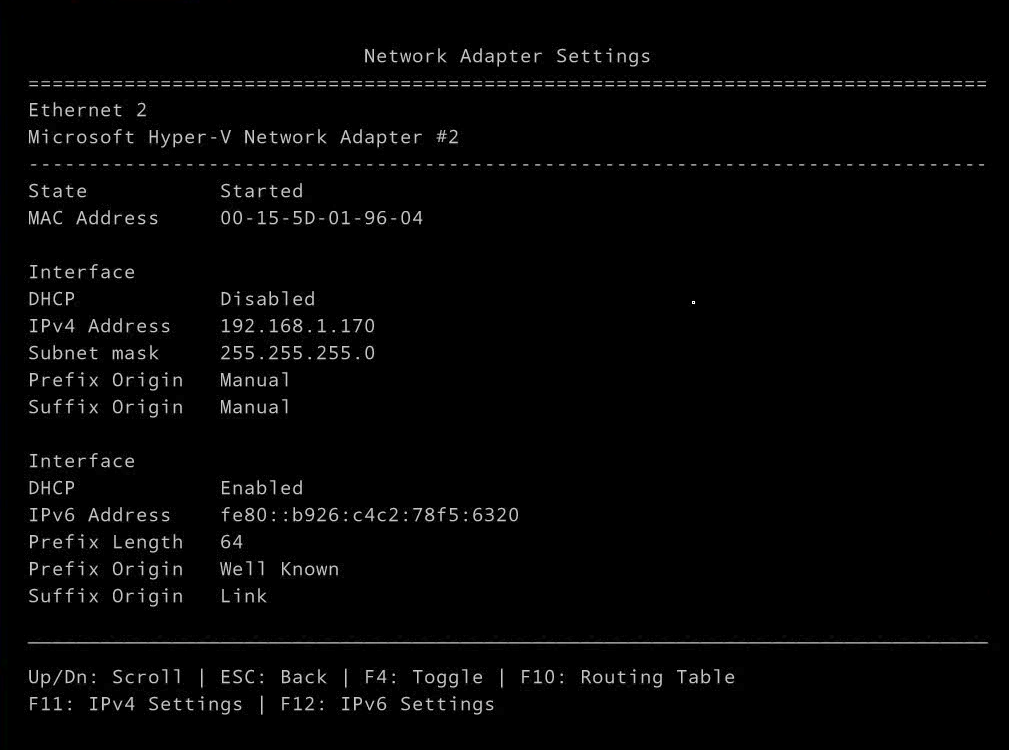
To do this, select Networking and then select the interface. From there you will see the settings details for that interface. Hit F11 to change the settings for IPv4.
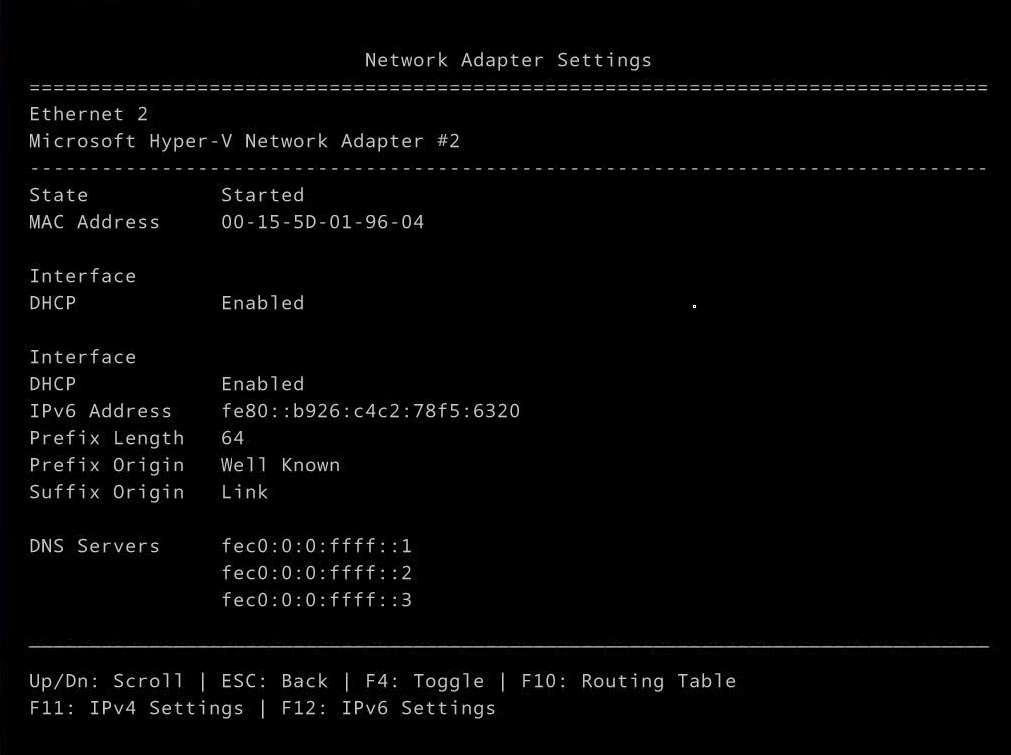
Toggle DHCP off by pressing F4. You now can enter in your IP address, default gateway, subnet mask, etc. Tab between lines and when you finish press enter.
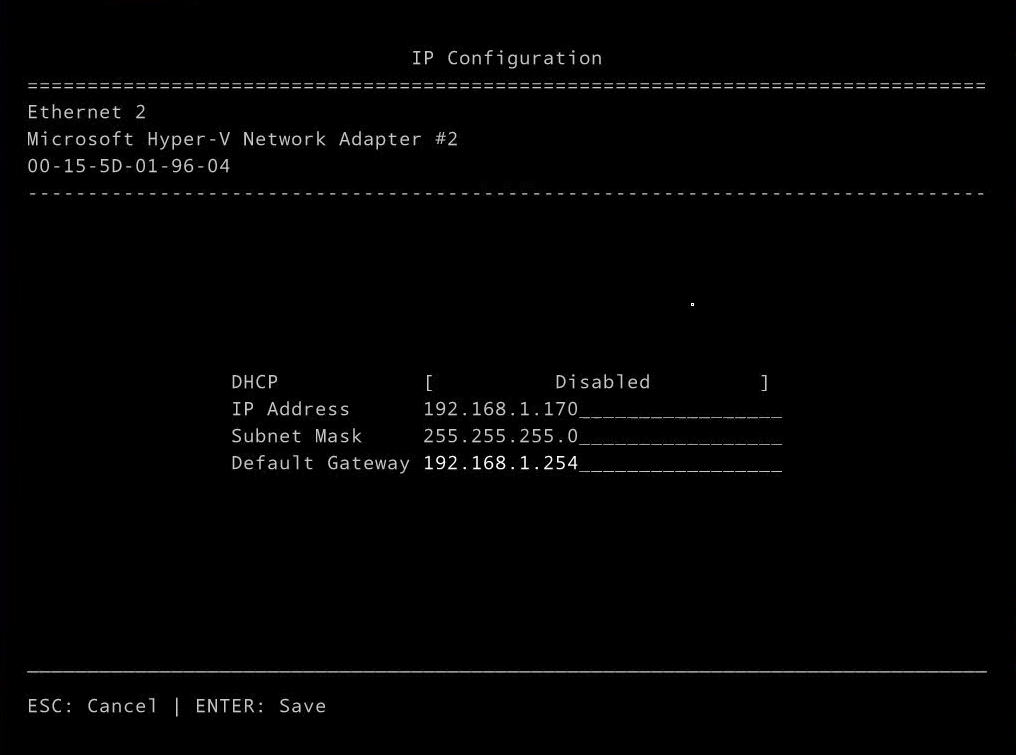
exit by pressing ESC.
Confirm that your settings were saved back in the interface’s menu.
Before using Nano Server, you may want to look through the firewall settings and enable any of the services you plan to use. Some settings I will be choosing for this will be all of the various file sharing features.
This is one of the most unique features for Nano. Essentially nothing is allowed. And you will have to cut on the specific features you know you’ll use. This is part of it’s lightweight nature and security.
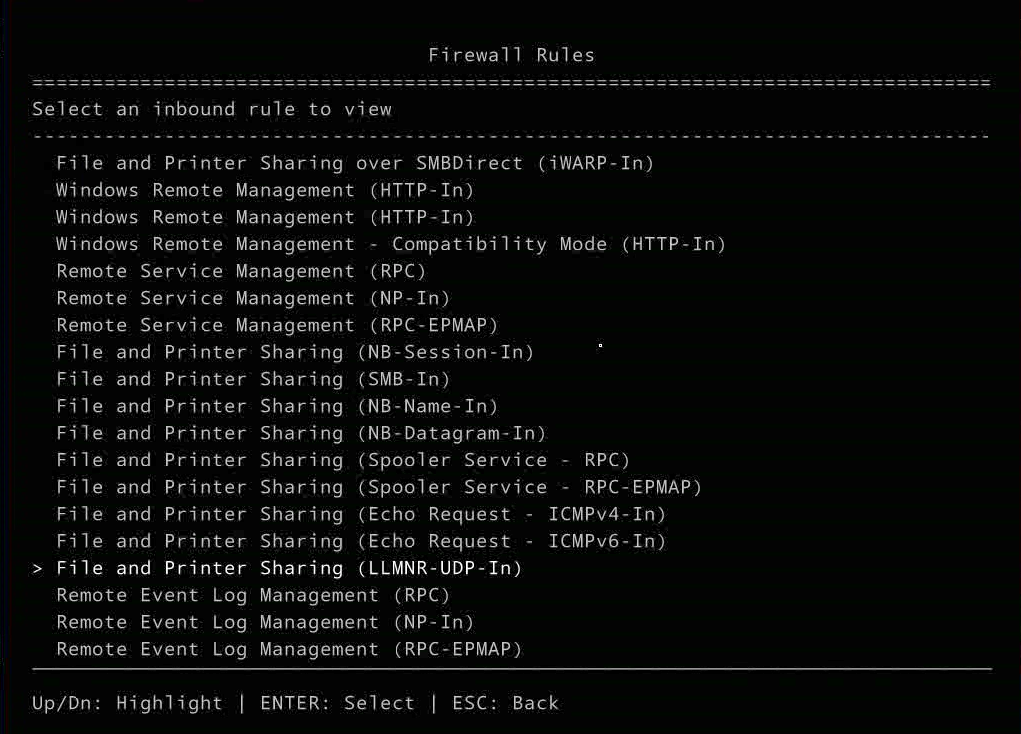
With file sharing setup on your Nano Server, you should be able to access it by going directly to the IP address in an explorer window.
Next you will want to join the Nano Server to the domain. There are different ways to add it to the domain. In this case I will do an offline domain join.
Create the odjblob file configure script with this PowerShell command.
djoin.exe /provision /domain nlblab.com /machine MachineName /save odjblob
Open PowerShell as admin and run this line to allow your domain controller to do a remote connection to the nano server. This line edits your security configuration. This adds the IP to the trusted hosts list.
Set-Item WSMan:\localhost\Client\TrustedHosts "192.168.1.170"
Use the IP address you setup for your Nano Server in place of 192.186.1.170
enter in Y to confirm and press enter.
enter these lines to open a PowerShell session. You don’t have to create an alias for the IP but it makes it easier.
$ip="192.168.1.170"
Enter-PSSession -ComputerName $ip -Credential $ip\Administrator
Copy the odjblob file that was created with the djoin.exe line earlier from your domain controller over to your NanoServer machine in explorer.
Finally use this line to add the NanoServer to the domain
djoin /requestodj /loadfile C:\odjblob /windowspath C:\windows /localos
Press enter and once you see The operation completed successfully then you will need to restart.
shutdown -r -t 0
You will see the connection being lost and then you should be able to reconnect to the machine.
From here you should be able to use the domain in the Nano Server login.
That’s it. That’s installing Nano Server and adding it to a domain.
If you’d like to test this machine you can create a HTML page, or MD page and place it on the root directory of the Nano Server. Then from a browser you can use the IP address of the name or the machine to open up the page. Simple!
Cheers, Zack Jones
Additional images will be added soon